Tuesday, October 22, 2013

Preschool - Playroom - Classroom Tour

This post is long overdue, I realize. I’ve been saying that I would post a ‘tour’ of our school for awhile now … the problem is just that I’m always adding something or changing something or SOMETHING. I think I’ve just about finished all the little finishing touches … so … if you can stand to jump back to the age of 4 with me, I’ll take you on a little ‘tour’. ;)
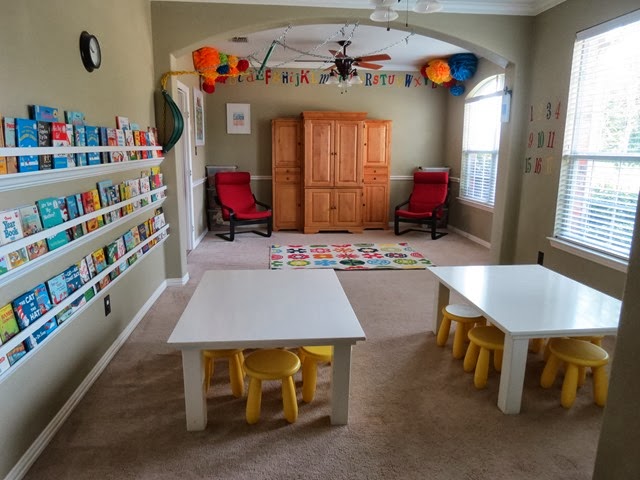
Classroom Preschool Homeschool Kindergarten Ideas www.stylewithcents.blogspot.com

Our preschool room uses the front ‘two’ rooms of my home. It seems the safest and least awkward place to dedicate to a smattering of pint sized lovies. I’m not a huge fan of my 8 year old carpet; however, please feel free to praise me lavishly for being on year 5 of preschool with the same original carpet. Maybe next summer will be the summer we finally get around to putting in wood floors … maybe.
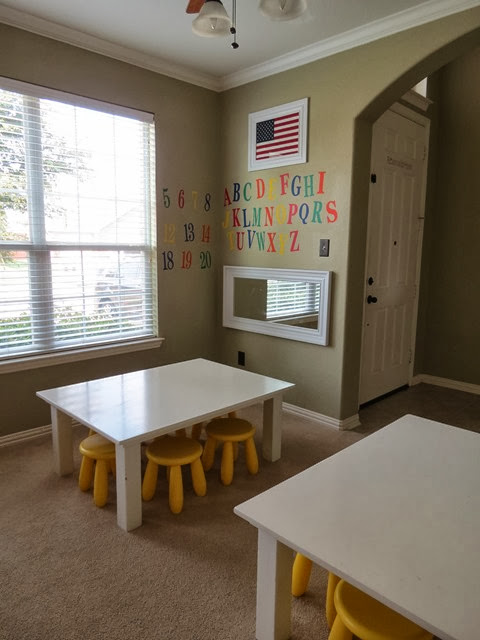
Classroom Homeschool Pottery Barn Kids Activity Tables www.stylewithcents.blogspot.com


See? There’s my front door, in all it’s glory. Yes, this means that this preschool room is the very first thing that people see when they walk into my home …. …. which is probably why I’ve been so obsessive with its evolution.

You can read the tutorial for those adorable 'Knock Off Pottery Barn Kid’s tables' here. The little yellow stools are from IKEA.
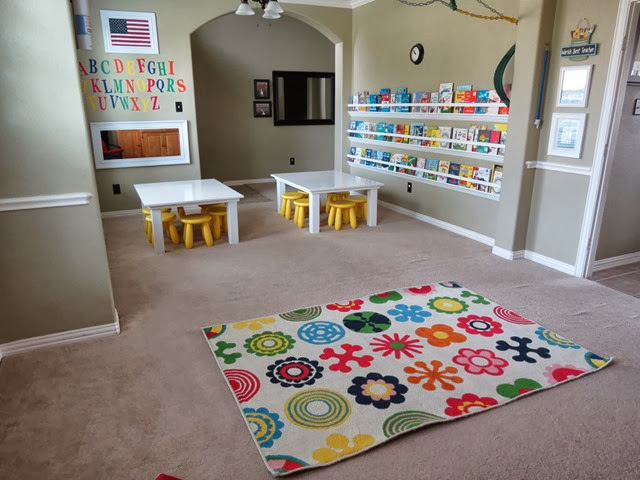
Classroom Preschool Homeschool Kindergarten IKEA Rug www.stylewithcents.blogspot.com

This poor bargain rug from IKEA is on its second year of torture and abuse from all these little ninjas and warriors. It gets trampled, rolled, folded, and chewed on daily. I seriously think it was $15 at IKEA … so … it’s been well worth the price. IDK, maybe it was $20.
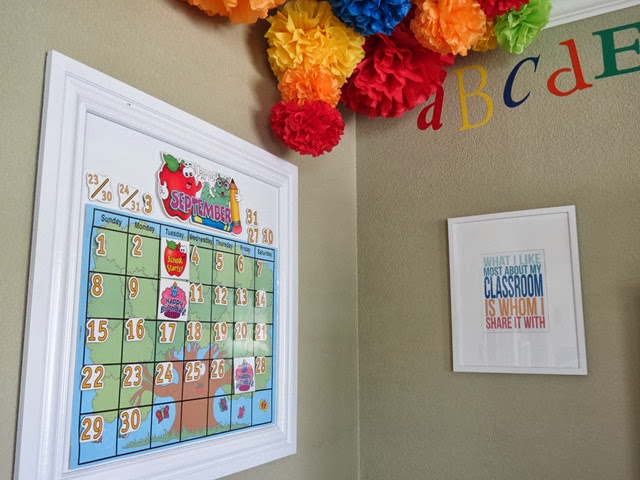
Classroom Back To School Calendar www.stylewithcents.blogspot.com


Our class calendar is a new addition this year … holy cow … I love it! Superman framed a piece of sheet metal with some cheap baseboard, then spray painted the whole thing white … and KABOOM! A magnetic calendar was born!
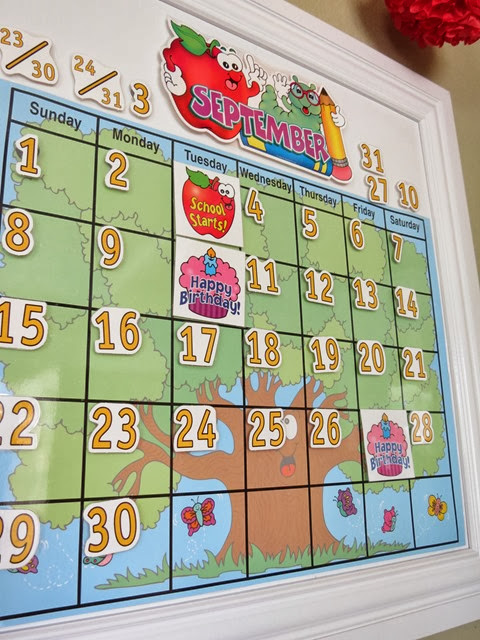
Classroom PreK Kindergarten Calendar www.stylewithcents.blogspot.com

I bought the calendar itself at Mardel’s, then I laminated all of the components and hot glued a ceramic magnet on the back, like this:
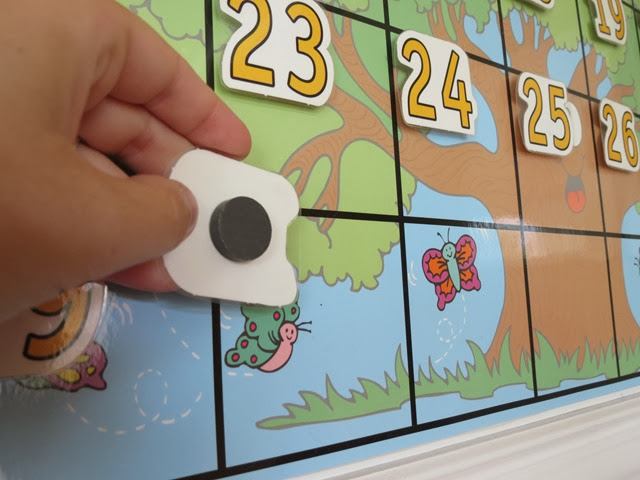
Classroom Magnetic Calendar www.stylewithcents.blogspot.com

There’s plenty of room at the top of the frame for any extra monthly magnets, so that I can keep them handy. I store the rest of my calendar supplies in a pencil box in the cabinet.


My most favorite things in our classroom are the fun gifts that kids have given to me over the years, for our classroom. * HINT: If you’re ever uncertain on the perfect teacher gift … just give her (him) something to display in the classroom. They are my favorite gifts!

Classroom - My Favorite Thing About My Classroom Is Whom I Share It With www.stylewithcents.blogspot.com


This sweet subway art sign was gifted to us from a little boy last year … and I could not agree more with its sweet message. I love every single one of those little squirts.
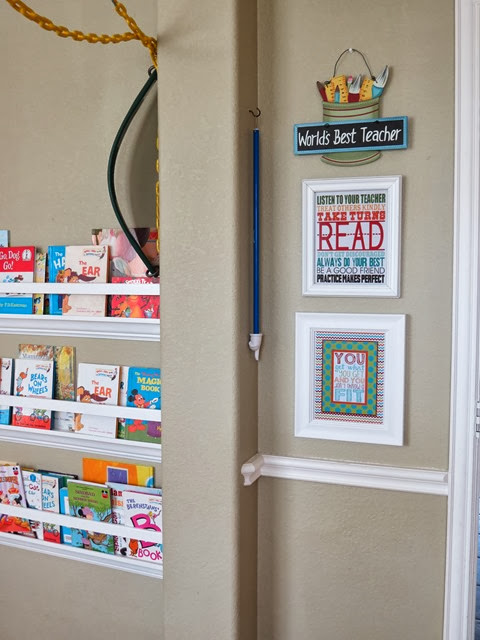
Classroom Preschool Homeschool Kindergarten Decor www.stylewithcents.blogspot.com


The very first year that I taught preschool, sweet Emilee’s Momma gave me that ‘World’s Best Teacher’ sign. Made me feel like a million bucks. And the following year, Little Corbin’s Mom gave me the subway art that hangs below it. I love them both so much. I truly LOVE my job.
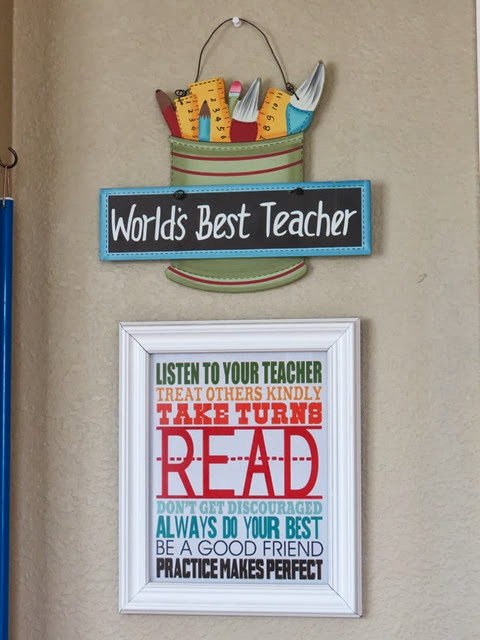
Classroom Kindergarten Preschool Homeschool Decor www.stylewithcents.blogspot.com


It seems that every corner of this classroom is filled with sweet memories of years passed. I feel so blessed every single day.
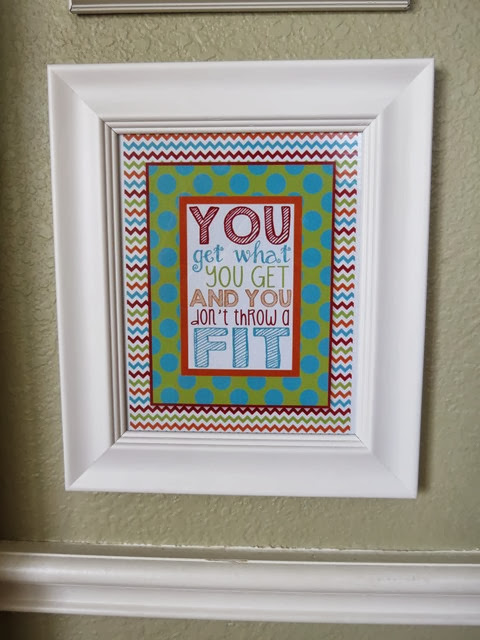
Classroom You Get What You Get And You Don't Throw A Fit www.stylewithcents.blogspot.com


After a couple years of teacher preschool by myself, I was able to hire a teacher to come teach with me everyday. Ms. Andrea has been a major blessing in my life. This summer, she found this ‘You Get What You Get And You Don’t Throw A Fit’ sign and brought it by for the classroom. We must say that phrase at least a half dozen times every day.
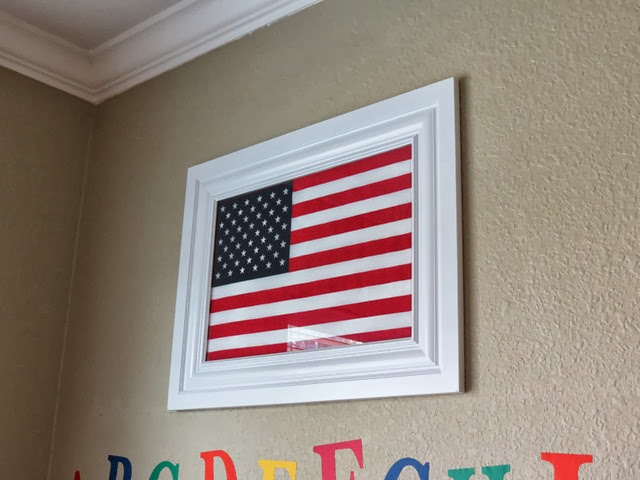
Classroom Baseboard Framed American Flag www.stylewithcents.blogspot.com


‘If it worked for me, it’ll work for them’ … every morning, we place our hands on our hearts and pledge our allegiance to that flag. It’s a simpey $1 American Flag that comes on a wood dowel … you know … the one you wave at the local parade every year? Yep. That el-cheapo one. Superman framed it out with some baseboard and we slapped a piece of glass in it. You can hardly tell that it cost all of $4, total. ;)
And … because I work with a slew of little circus animals each day, we needed some sort of behavior ‘chart’ to help them to be aware of their behavior at all times.

Classroom Magnetic Behavior Chart www.stylewithcents.blogspot.com


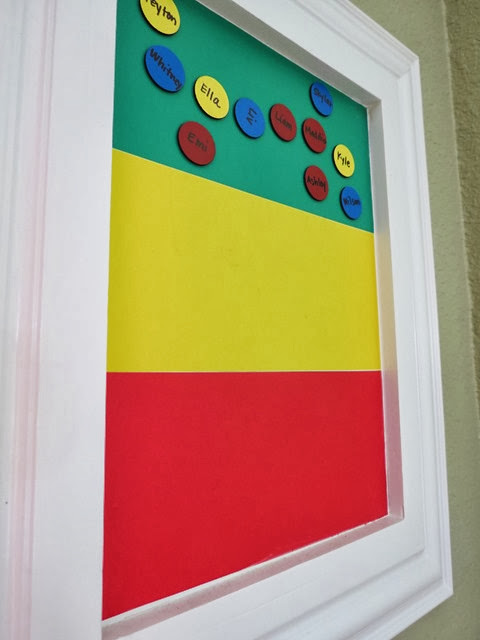
Behold: our behavior ‘chart’ …

Classroom Magnetic Behavior Graph www.stylewithcents.blogspot.com


It’s just a piece of sheet metal, covered in vinyl, and framed with baseboard. Superman is a genius … have I said that before?
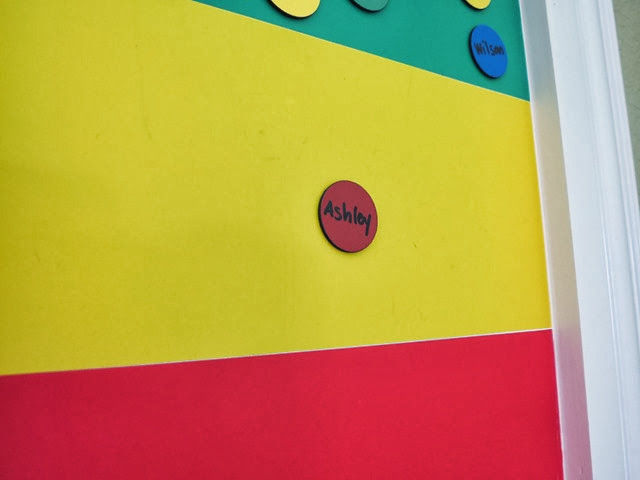
Classroom Magnetic Behavior www.stylewithcents.blogspot.com


Each kiddo has their own magnet … the goal is to stay on green, obviously … but every now and then someone needs a visual reminder to bring their listening ears to class. ;)

Another new(er) addition is our decorative alphabet and hanging pompoms.
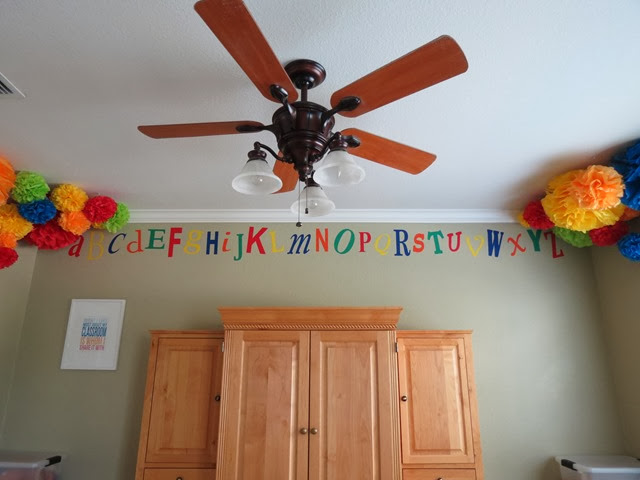

Classroom Vinyl Alphabet Tissue Pom Poms www.stylewithcents.blogspot.com


A friend of mine does vinyl lettering and made the vinyl alphabet for me … I made the pompoms, with the help of a Pinterest tutorial. Holy cow, they’re soooo easy.

Classroom Decorating Ideas Tissue Pom Poms www.stylewithcents.blogspot.com


I actually made the pompoms over Spring Break and surprised the little lovies when they came back from the break.

Classroom Preschool Kindergarten Decorating Ideas www.stylewithcents.blogspot.com


Needless to say, they LOVED them! I just raided Superman’s fishing tackle for some fishing line and strung them up using eyelet screws in the ceiling. I know, I even surprised myself with that crafty plan.


And, while my main goal is to make this room feel like home … even if it’s my ‘office’ … I also strive to be very functional. Every inch of that entertainment center is filled with preschool necessities. After 4+ years, you figure out a few tricks …
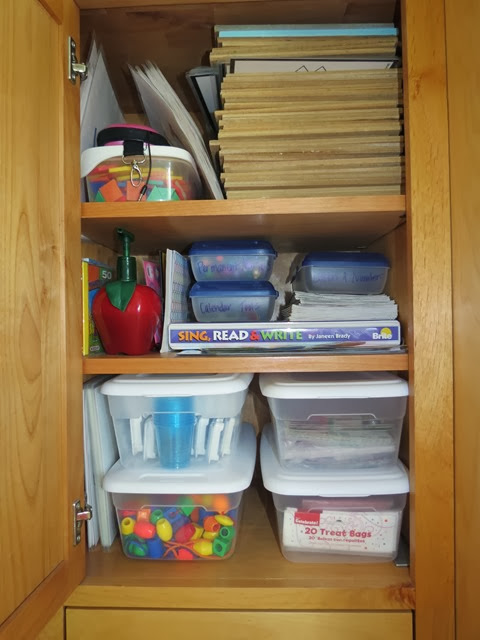
Classroom Organization www.stylewithcents.blogspot.com


Sorry … that picture looks a little blurry … even more sorry … I’m too lazy to take another one. ;) I’m a major fan of these $.99 plastic shoe boxes. I must own 100 of them. Not joking.

Classroom Kindergarten Organization www.stylewithcents.blogspot.com


These pencil boxes are also the perfect size for a lot of supplies … and … about 2 weeks after school starts, those babies go on sale for $.10/each. KABAM!
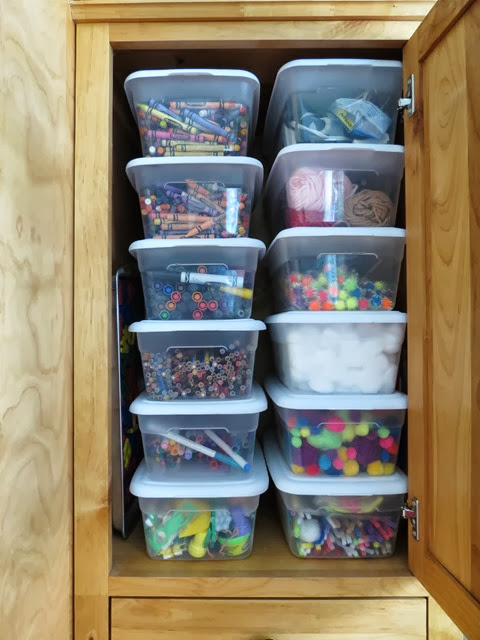
Classroom Organization Preschool www.stylewithcents.blogspot.com


Supplies that no preschool teacher should ever be without or run out of … cannot tell you how many times I have reached for cotton balls for a certain craft and come up empty. It’s the WORST!!! You can’t make rain clouds without cotton balls, people!
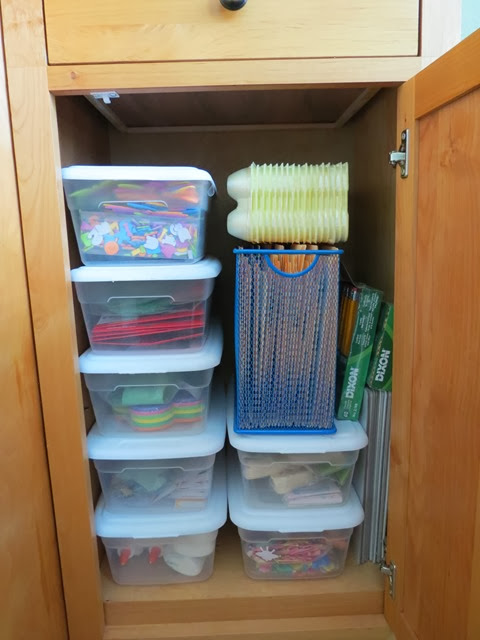
Classroom Kindergarten Preschool Homeschool Organization Ideas www.stylewithcents.blogspot.com


I’m telling you … every. single. inch. of these cabinets is filled with preschool nonsense.
I know you’ve seen these rain gutter bookshelves a hundred times on here … but now you can see them in ‘context’. ;)
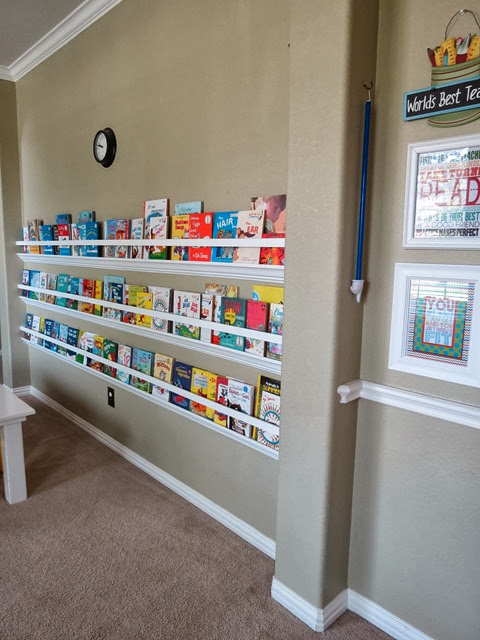

Classroom Raingutter Bookshelves www.stylewithcents.blogspot.com


And, typically, all of those books are upside down, backwards, sideways, disheveled, and totally unkempt … but I wouldn’t have it any other way. Books are a ginormous part of our lives between the hours of 9am and 12pm, Monday – Friday.
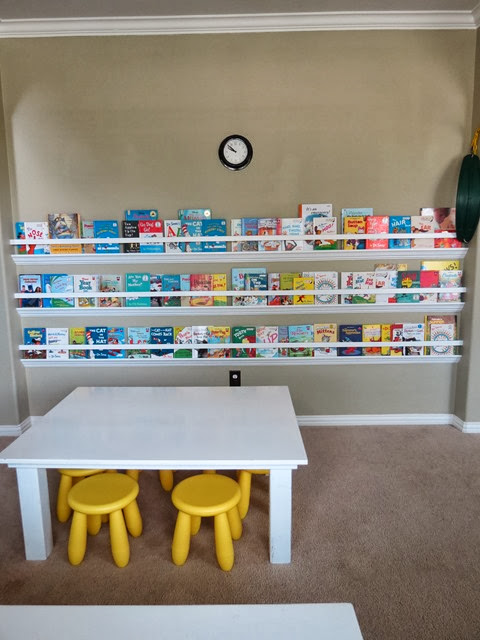
Classroom Preschool Kindergarten Homeschool Raingutter Bookshelves www.stylewithcents.blogspot.com


No classroom could be complete without a short people mirror, framed out with … you guessed it … baseboard. ;) Ms. Andrea and I love watching the vain little circus animals amuse themselves with their silly faces. (ps- I totally left those finger prints on the mirror for you on purpose … wanted to give you the full effect ;)

Classroom Preschool Baseboard Framed Mirror www.stylewithcents.blogspot.com


And …. at the end of the day … it’s still my two favorite kiddos' playroom. Our favorite time is when we can let the swings down and play to our heart’s content … after school hours.

Classroom Preschool Playroom Indoor Swings www.stylewithcents.blogspot.com


If you’re interested in hanging some swings in your home … you can read that tutorial here.

Monday, August 12, 2013

Entertainment Make-OVER

First of all, y’all try not to fall over dead because I updated this blog … I don’t carry liability insurance on the blog … only on the water slides.

So if there is anything that y’all should know about us by now, it’s that we are very practical people. Six years ago, back when eBay was hot (remember the days?), I won this TV on an auction for a total of $350. Um. 6 years ago, that was a pretty SWEET deal for a 50” flat screen television.

Our only problem? We had NO WHERE to put it because it was too big for our entertainment center. We shopped Craigslist and a few furniture places but couldn’t find anything we liked for a good price. So, we settled for a cheap TV stand from IKEA, knowing that we would eventually find something we loved and replace it later. Fast forward 6 years …

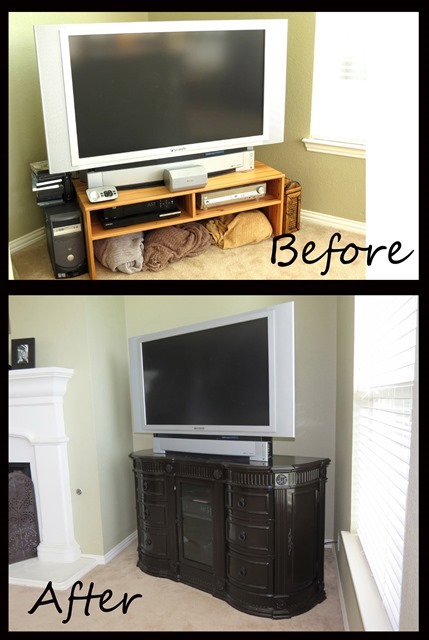
Style with Cents Dresser TV Stand Renovation www.stylewithcents.blogspot.com    Before and After

Yeah. We were sort of slow to make any changes during the whole ‘starting our family’ stage of life. However, several months ago, a friend of mine texted me a picture of this dresser she had that she wanted to get rid of. For FREE. I thought she was crazy, so I traded her a painting for the score.
 Style with Cents Dresser TV Stand Renovation www.stylewithcents.blogspot.com    11

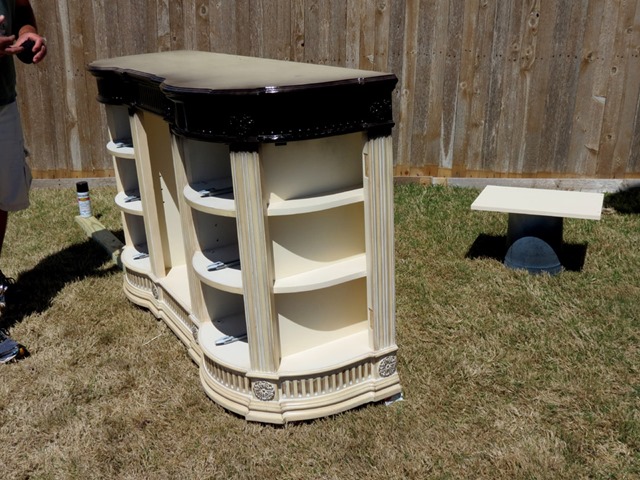
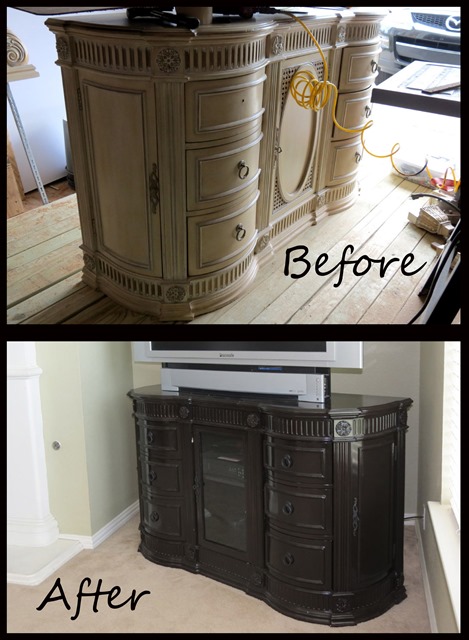
I wasn’t a big fan of the cream color (or the wicker around the center cabinet door – what the aitch?) and it came with these weird feet that raised the bottom up off the ground about 4 inches (Superman had already taken those off by the time I took this picture), but Superman said he could fix all of those things, so I was totally in. And that’s where this project begins. :D

Style with Cents Dresser TV Stand Renovation www.stylewithcents.blogspot.com    7

Dude started by bringing the dresser out to the grass, and putting it on some 2x4’s. Then, he spray painted it. I know y’all were hoping to hear that it was a lot more difficult than that, but … nope … sorry … this one was easy.
 Style with Cents Dresser TV Stand Renovation www.stylewithcents.blogspot.com    6

The only hard part was hauling the heavy monster out of the garage, twice, so that he could put two coats on the thing. The first coat didn’t go on very evenly … you’ll definitely want to use two coats if you find your own treasure to re-paint.

Style with Cents Dresser TV Stand Renovation www.stylewithcents.blogspot.com  4

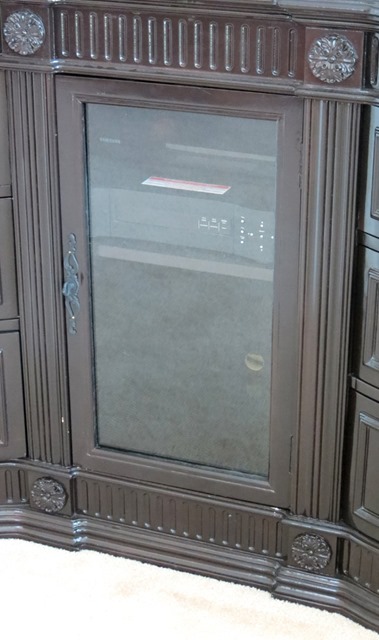
Remember the ugly wicker thing on the middle cabinet? Superman just used his saw, cut it out, then replaced it with a piece of very thick glass, which he picked up at Habitat for Humanity. LOVE that place.

Style with Cents Dresser TV Stand Renovation www.stylewithcents.blogspot.com    9

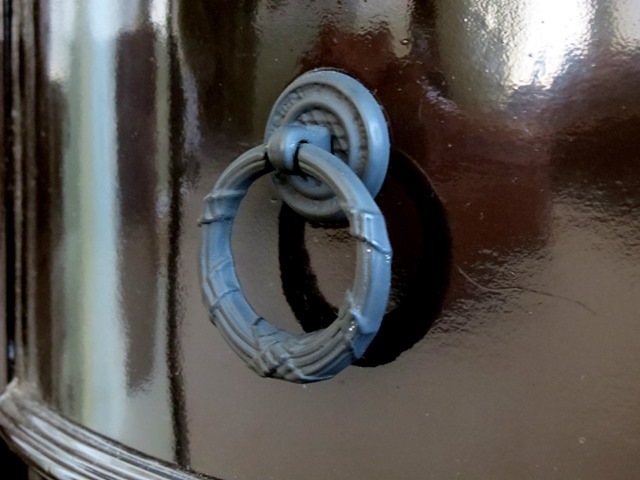
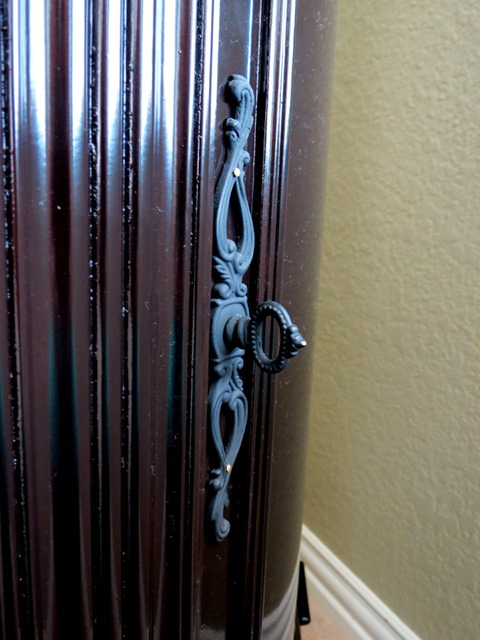
For the hardware, he wanted to go non glossy … and actually ended up spraying the hardware pieces with some of the High Heat Rustoleum that he used on the outdoor smoker. Nope. Not kidding.
Style with Cents Dresser TV Stand Renovation www.stylewithcents.blogspot.com    10

I didn’t think I was going to be a fan of the hardware, but I actually love it. I seriously could not be happier with the finished product!

Style with Cents Dresser TV Stand Renovation www.stylewithcents.blogspot.com

Superman totally nailed what I was wanting … and the whole project only cost us a few cans of spray paint. LOVE that.

Style with Cents Dresser TV Stand Renovation www.stylewithcents.blogspot.com    2

Here’s a before and after of the dresser/TV stand:

Style with Cents Dresser TV Stand Renovation www.stylewithcents.blogspot.com    Before and After 2

So … what are some of your before/after treasures? Post a link in the comments. I’d love to see them!!

Monday, June 10, 2013

$100 Target Gift Card Summer GIVEAWAY -- WINNER ANNOUNCED BELOW!

CONGRATULATIONS TO SANDY NELSON, entry #1097!! You are the winner!!

Happy Monday, Everyone!

 
I hope you all enjoyed your weekend! Friday, the 31st, was the last day of school for us, which means it was our first official week of summer last week ... and we packed it full!


Superman and I spent the week putting the finishing touches on our new business venture: Engine 9 Bounce!  We just might be crazy! If you live in the DFW area and need a water slide for a party, you know who to call. This week we start our regular trips to the pool, staying up way too late, and eating way too many popsicles.


To help you start your summer off right, I've teamed up with a wonderful group of bloggers to bring you 10 Fun Summer Ideas and an awesome giveaway - a $100 Target gift card!


Please take a moment to check out these great ideas for summer and then enter to win a $100 Target shopping spree! Let's be honest....who couldn't use $100 to spend at Target!?
 

On to the Summer Fun Ideas:
And now on to the Giveaway! a Rafflecopter giveaway

Tuesday, June 4, 2013

How to: Build a NEW Fence, Using OLD Scraps

Um, hi.

We’ve been a little busy over here … sorry it’s taken awhile to get this new post up, but I think y’all are gonna LOVE it for a summer project. If I had to take a stab, I would guess that 99% of homeowners don’t love their fences … and I’m gonna show you how to be part of the 1% without spending tons of money.

Okay. Here we go.

How to Build a New Fence Using Old Scraps www.stylewithcents.blogspot.com

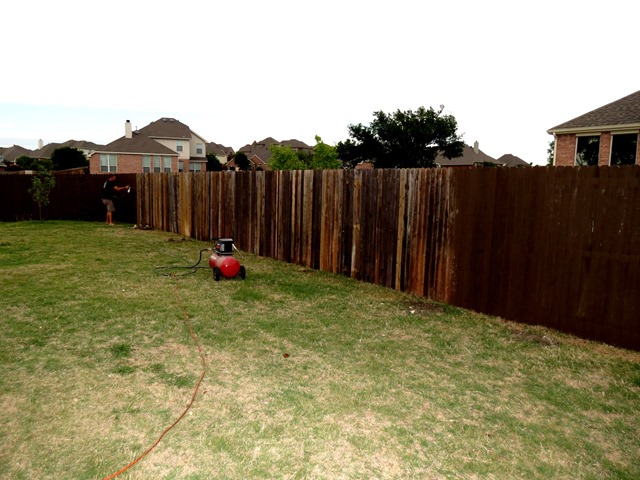
Okay, so this is what our fence WAS … you might remember me mentioning needing to replace it, when I showed you how to stain your fence for dirt cheap. Those wood posts were just a little too wobbly for our liking.

How to stain an old worn out fence for dirt cheap using 'Oops' paint from Home Depot - After

Well.

A little over a year later, the time had come. We had tons of steel fence posts left … when our HOA replaced our neighborhood’s perfectly good perimeter fence a couple years ago, Superman asked the fence company if he could have the old steel posts. They were THRILLED because it meant they didn’t have to haul them off. :D We were thrilled because they were FREE. ;)

So.

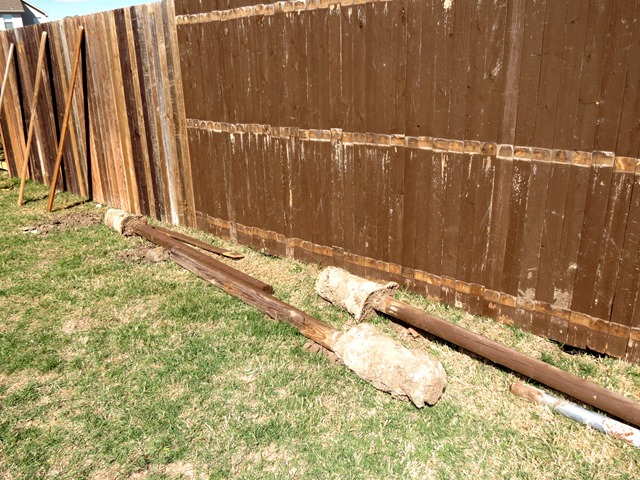
Superman tore down the entire side of the fence. This was easy – the house next door is vacant, so there wasn’t anyone to disrupt over there while we got down to business.

How to Build a New Fence Using Old Scraps www.stylewithcents.blogspot.com. 7

Superman used the same holes from the previous wooden fence posts. He stuck a steel post in each and then filled the hole with cement, making sure each post was the same height coming out of the ground and that they were perfectly straight. USE A LEVEL.

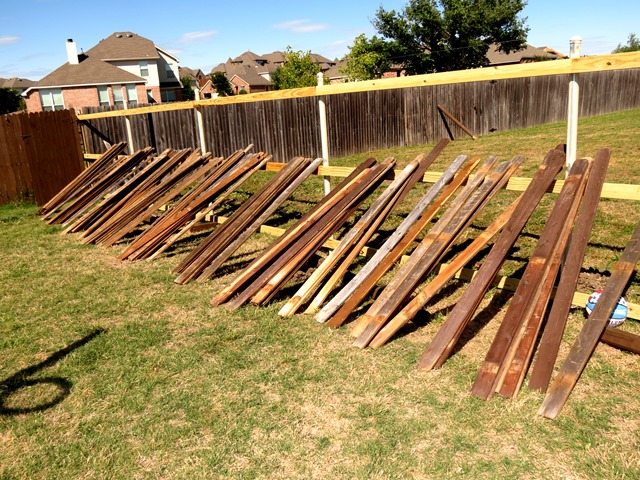
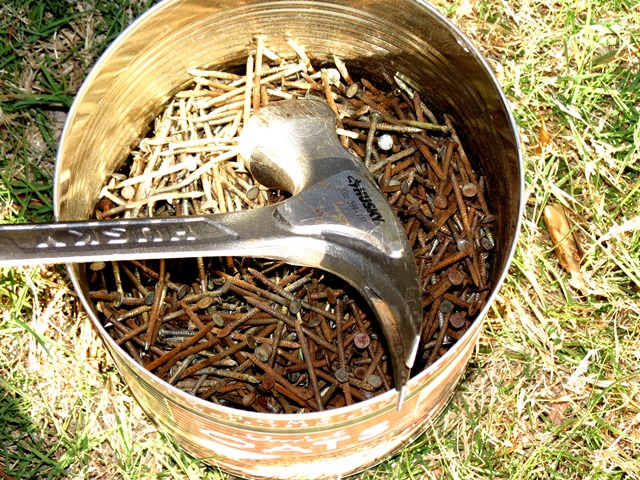
Then, he bought NEW cross beams. He put those up … and all that was left to do was just put up the pickets. He reused as many fence pickets as he could from our existing fence, but needed to replace about half of them. So. He turned to Craigslist. He found some other homeowners who also weren’t loving their fences and were replacing. He found several gently used fence panels from several places. He brought them home, stripped the pickets off, and pulled out the nails.

How to Build a New Fence Using Old Scraps www.stylewithcents.blogspot.com. 10

Um. This part is NOT fun. Like, at all. I’d rather jab dull pencils through my eyes. But. It did save us, easily, $2,000. And Superman is a patient man. So. You know. It worked out. ;)

How to Build a New Fence Using Old Scraps www.stylewithcents.blogspot.com. 11

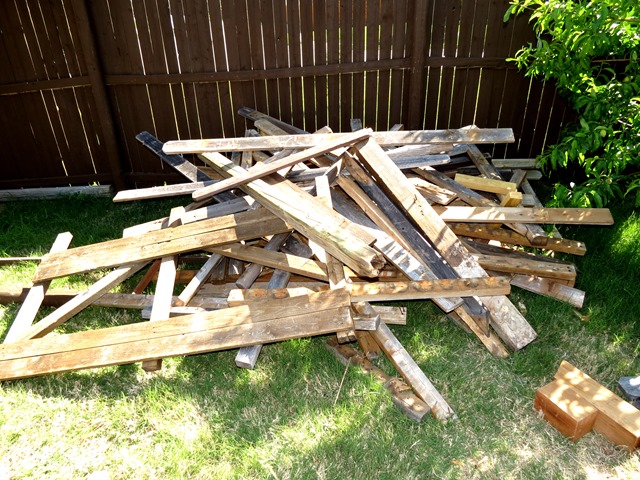
We ended up with several scrap piles like this that later got hauled off.

How to Build a New Fence Using Old Scraps www.stylewithcents.blogspot.com. 12

Dude just picked through each fence post, took the good stuff, and dumped the junky stuff.

And then.

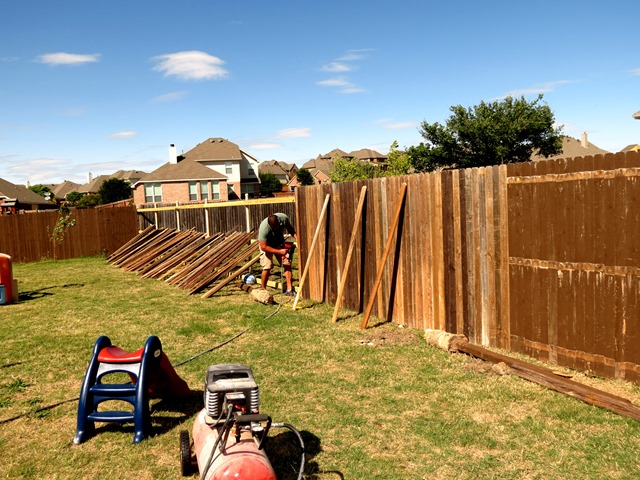
He got to work nailing up each picket. (he still needs to go back and put a few screws in each picket, but that’s for another day)

How to Build a New Fence Using Old Scraps www.stylewithcents.blogspot.com. 8

Something else we decided to do was flip the fence around so that we don’t have the posts on our side anymore. :D HEHEHEHE. You can do that when the house next door is vacant. Now it will be easier for Superman to mow and edge.

How to Build a New Fence Using Old Scraps www.stylewithcents.blogspot.com. 6

So, you can see how many pickets came from our old fence and how many were ‘new’ replacements.

How to Build a New Fence Using Old Scraps www.stylewithcents.blogspot.com. 9

My big contribution was to take all those fence pickets, from a ginormo messy pile, and place them up against the rails so that Superman could easily and quickly get them nailed up. I know. I rock.

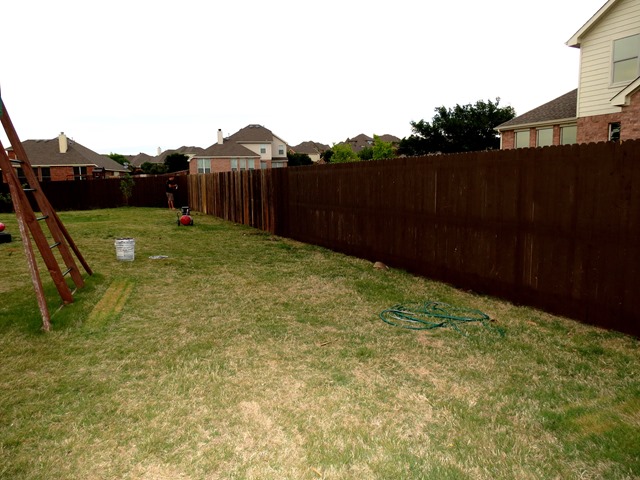
When he finished constructing the new fence, it looked something like this:

How to Build a New Fence Using Old Scraps www.stylewithcents.blogspot.com. 5
How to Build a New Fence Using Old Scraps www.stylewithcents.blogspot.com. 4

So, then he whipped out some of his trusty cheaper than dirt fence stain … and got to work:

How to Build a New Fence Using Old Scraps www.stylewithcents.blogspot.com. 3

Firefighters are hawt.

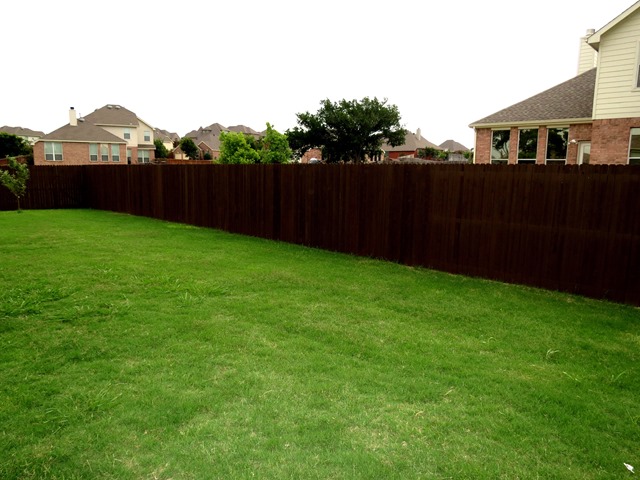
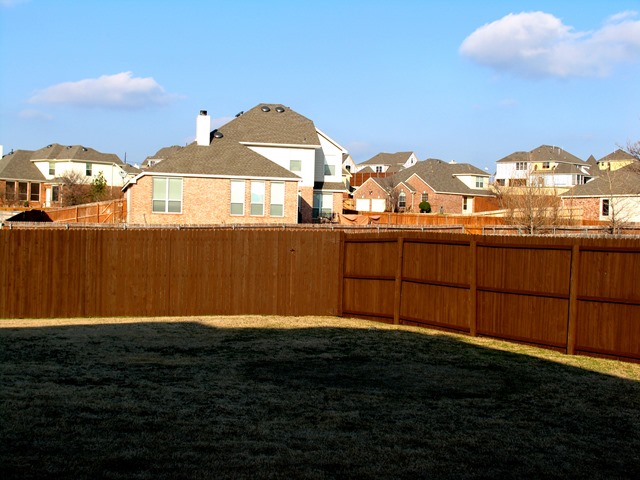
Because the stain he mixed up is semi-transparent, he didn’t need to bleach the boards … it covers all the inconsistencies really well. You can’t even tell it was a ghetto rigged garbage fence, huh?

How to Build a New Fence Using Old Scraps www.stylewithcents.blogspot.com. 1

Our total cost? About $100 for the cross beams. BOOM!!

How to Build a New Fence Using Old Scraps www.stylewithcents.blogspot.com

I married Superman, dude.

Monday, May 13, 2013

Gardening for Dummies: I hate Monsanto

***** Update: I'm sitting here late tonight totally stressed out about having just fed my plants a Monsanto product. How on earth do they do it?! How is Monsanto EVERYWHERE?! Clearly, I'm a rookie gardener ... I've been honest about that from day 1. I have to learn to read labels and research. Just like I search every label for high fructose corn syrup, I must now google search every company to find out if its parent company is Monsanto and therefore not consumable. Sorry to so carelessly promote something from evil Monsanto.

DON'T USE MIRACLE GRO. I'll be throwing mine out now ... actually, I'll probably take it back to Costco since they have such a great return policy. Or maybe call the money guarantee on the back of the box. Ugh. I'll let you know what I find as a replacement ... and how well my garden does without it.


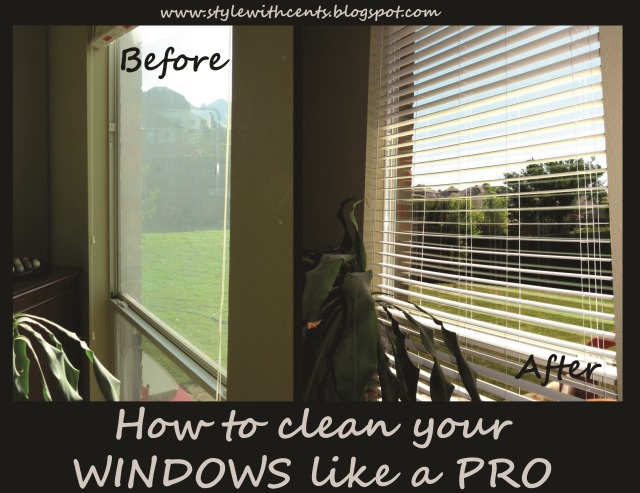
How to: Clean your windows like a PRO

Okay.

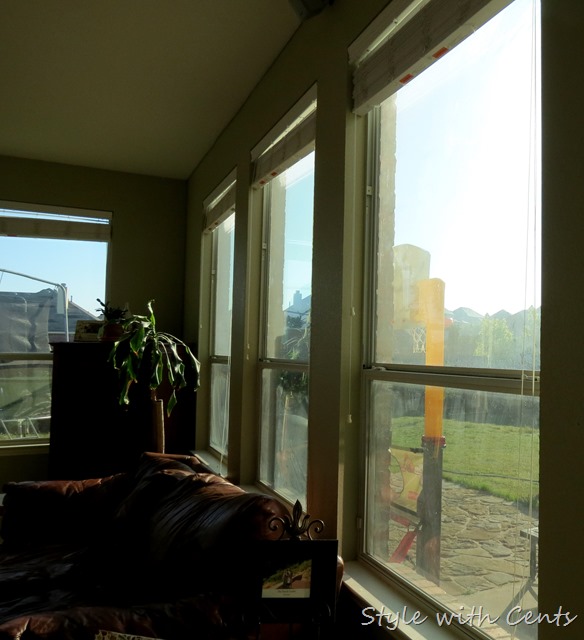
So. Here’s the deal. We are all going to agree and take an oath and make a pact right now … that we don’t care about my dusty plant, okay?

Because it’s the truth. CLEARLY. I do not care about that plant. Superman loves plants. Me? Notsomuch. They’re just another thing to feed and take care of so they don’t die. Most days, I barely remember to feed my kids.

I’m joking. Kinda.

Okay.

I’m glad we made that deal/oath/pact. Now.

Let’s talk about my disgusting, nasty, grotesquely dusty windows, shall we?

We shall.

Because … this is where I’m going to teach you how to clean your windows like a pro … and I’ll pretend like I do it all the time … even though I don’t … and we’ll all save lots of money on window cleaning … and we’ll give each other high fives, fist bumps, and the thumbs up … and we’ll all go home feeling like rock stars.

Ready, set, go.

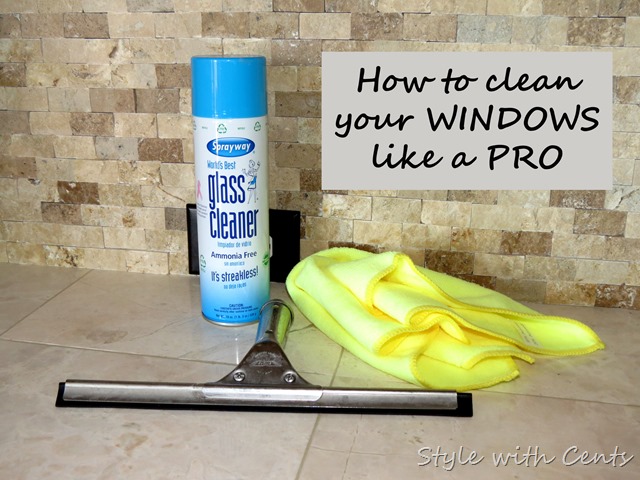
How to clean your windows like a pro. CHEAP and FAST using Sprayaway and a squeegee. www.stylewithcents.blogspot.com

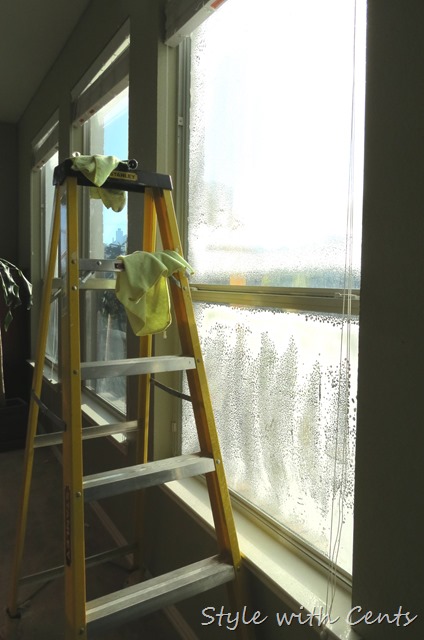
Now. Let’s all take a gander at my gross windows …

How to clean your windows like a pro. CHEAP and FAST. 4

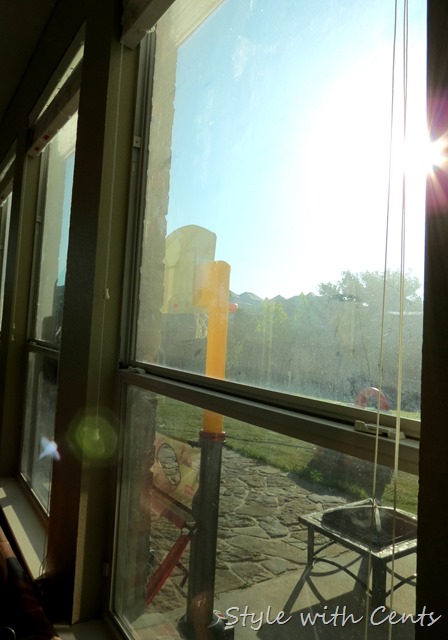
“Ewwwwwwwwwwwww. Agggggghhhhhhhh.”

How to clean your windows like a pro. CHEAP and FAST. 5

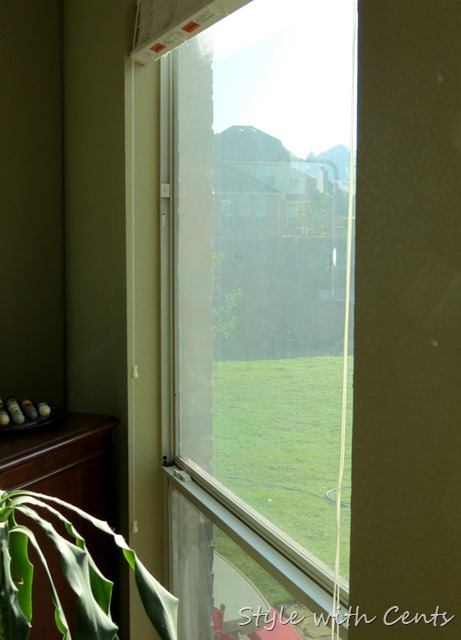
I’m just keepin’ it real. I’ve never claimed to be anything but GHETTO.

How to clean your windows like a pro. CHEAP and FAST. 8

I don’t know. I just don’t know how on earth I let them get so dirty. So, don’t ask. Cause I really don’t know.

Whew.

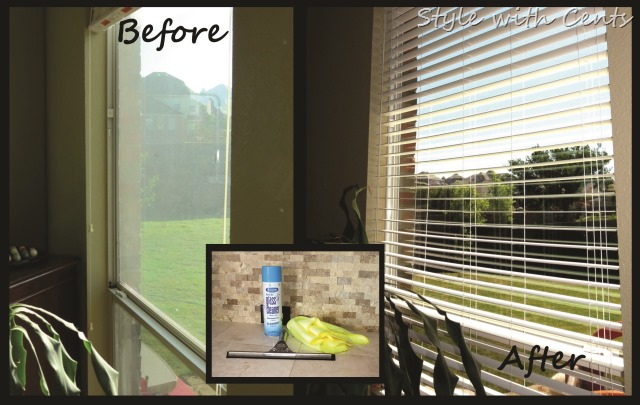
Now that my confessional is over and I feel totally naked and exposed, here’s all you need to do something about those gross windows in your house (I can’t possibly be the ONLY one with gross windows):

How to clean your windows like a pro. CHEAP and FAST

Sprayway foaming glass cleaner, a lint free cloth, and a squeegee. BAM.

How to clean your windows like a pro. CHEAP and FAST. 7

Coat your windows with Sprayway.

How to clean your windows like a pro. CHEAP and FAST. 6

** If you are doing the top portion of your window, I HIGHLY recommend placing the cloth along the bottom of the top portion (where the locks are) so that when you squeegee the cleaner off, it doesn’t fill the cracks between window sections. I hope that made sense.

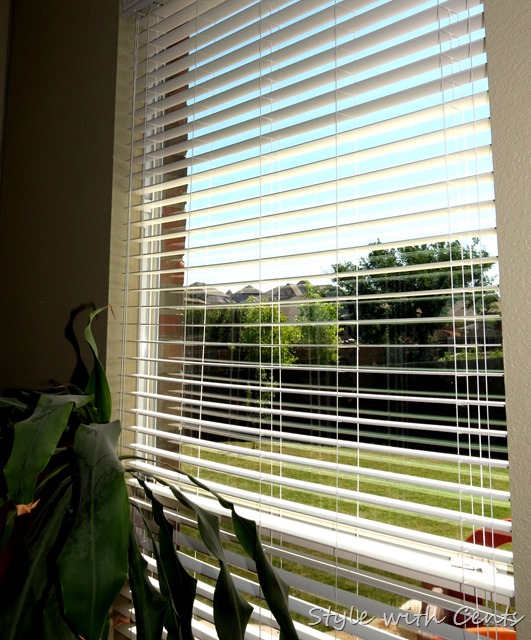
So. Coat the windows with Sprayway … squeegee off … then use your lint free cloth to wipe away any streaks (from the edges of the squeegee). And BAM! Your windows will sparkle!

How to clean your windows like a pro. CHEAP and FAST. 9

Sorry, guys. I forgot to get pictures before I put the blinds back down … no way was I muscle-ing them back up. Don’t get crazy. We all know I’m too lazy for that crazy business.

How to clean your windows like a pro. CHEAP and FAST. 10

Aaaaaaaaaaaaaaaaaaaaand, there’s that dusty plant again … the one that we took a vow to pay no attention to. Thanks for not paying any attention to it.

How to clean your windows like a pro. CHEAP and FAST using Sprayaway and a squeegee. www.stylewithcents.blogspot.com. Style with Cents

** As for the outside of the window? … I just sprayed them off with the hose and let them air dry. If you want, you can go all crazy and take the ladder outside and squeegee those too. But, as you can tell … it’s not really necessary.

Happy Spring Cleaning, y’all! :D

Next time, I’ll show you how to dust off all those indoor plants …

Juuuuuuuuuuuuuuuuuuust. Kiiiiiiiiiiiiiiiiidding.

Wednesday, April 24, 2013

Gardening for Dummies Part 1: Laying Out Your Garden

Okay.

So. If you know me, personally, then you know that I consider it a great success that I’ve kept my children alive as long as I have. I caved last year and let my three favorite people in the whole wide world get a puppy. And I was so scared. Because, dude. I kill EVERYTHING. (Both children and puppy are STILL alive … I’m amazed, myself)

Enter Superman.

Homeboy EARNS that nickname. Big time.

You saw the tutorial on how to build your garden box, right? … here’s a little follow up (with pictures I took 3 weeks ago … these are now quite a bit bigger).

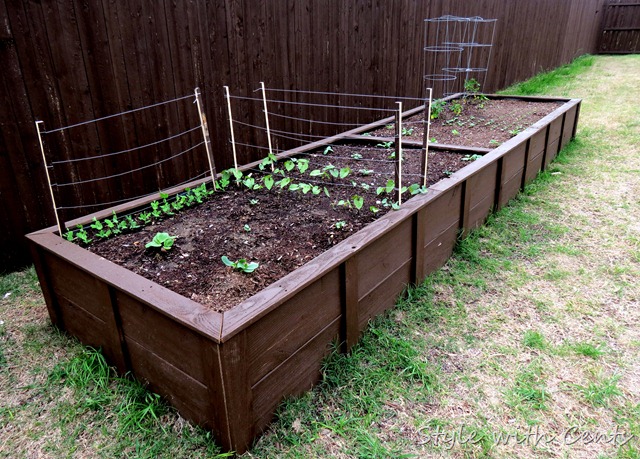
Behold! A garden! In my backyard! WITH green stuff growing!!

square foot gardening how to garden in a raised garden bed4

Believe me. No one is more shocked that I am. Promise.

square foot gardening how to garden in a raised garden bed5

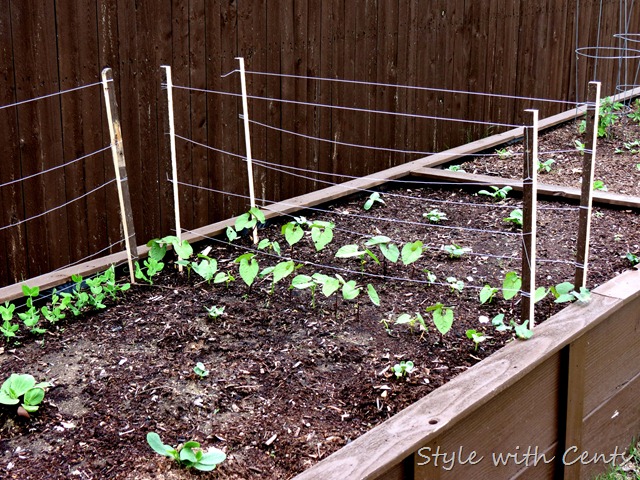
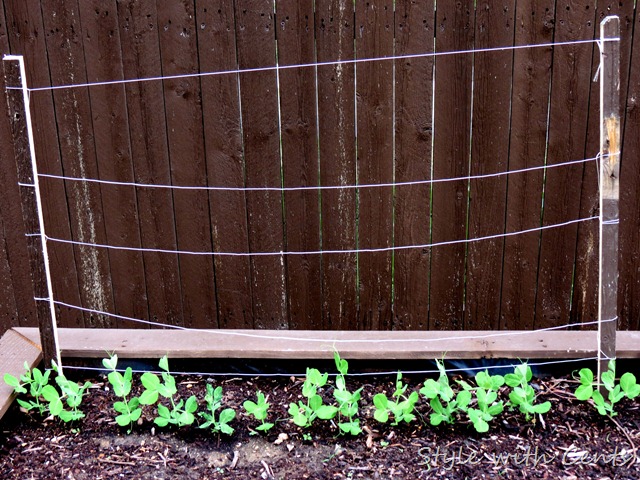
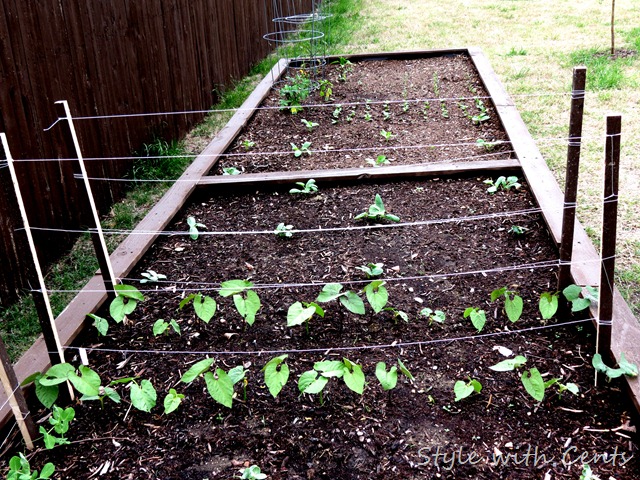
Alrighty. Let’s start on the left and work our way to the right … this is America, after all. (Please excuse our ghetto ‘trellises’ … they’re made from scrap wood … try not to fall over dead from that surprise)

square foot gardening how to garden in a raised garden bed10

First, we have the cutest little peas I’ve ever seen in my entire life! Since this picture was taken, they’ve figured out how to grow up the lines … they’re now occupying the third line of string. Such strong little fighters, living in my backyard!

square foot gardening how to garden in a raised garden bed9

Next, we’ve got some beans … green beans … climbing up their lines just to the right. They’re so flipping cute, I just want to pinch their cheeks! I can’t stand it.

square foot gardening how to garden in a raised garden bed11square foot gardening how to garden in a raised garden bed12square foot gardening how to garden in a raised garden bed13

And then, in the corner between the peas and beans … we have pumpkins and watermelons. Which, my kids can hardly wait to watch grow!

square foot gardening how to garden in a raised garden bed14square foot gardening how to garden in a raised garden bed15

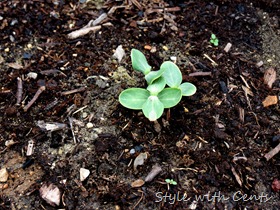
On the other side of the beans, we are sporting some adorable squash and zucchini plants.

square foot gardening how to garden in a raised garden bed8

And then there’s the radishes … y’all. There are no words for how cute these are. From planting until picking, it’s like 28 days, or something crazy like that. So. These babies will be getting picked in the next day or two. I’ll keep you posted. Can’t wait to take more recent pictures. You’ll be shocked at how big my babies are getting! ;)

square foot gardening how to garden in a raised garden bed7

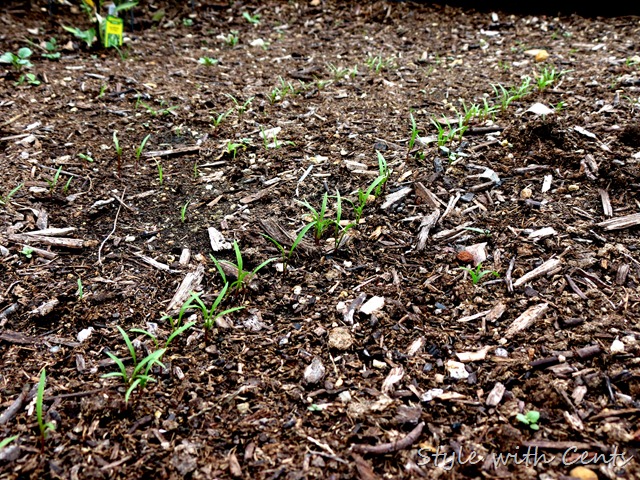
These are carrots, people! Aren’t those the cutest flipping carrots you’ve ever seen?! ;) (I’m totally joking, in case you don’t ‘know’ me yet … I’m not insane … that I know of)

square foot gardening how to garden in a raised garden bed3

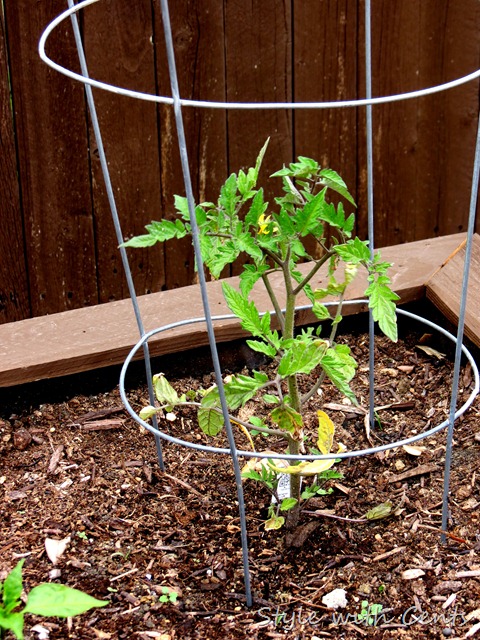
Then there are three different kinds of tomatoes …

square foot gardening how to garden in a raised garden bed2

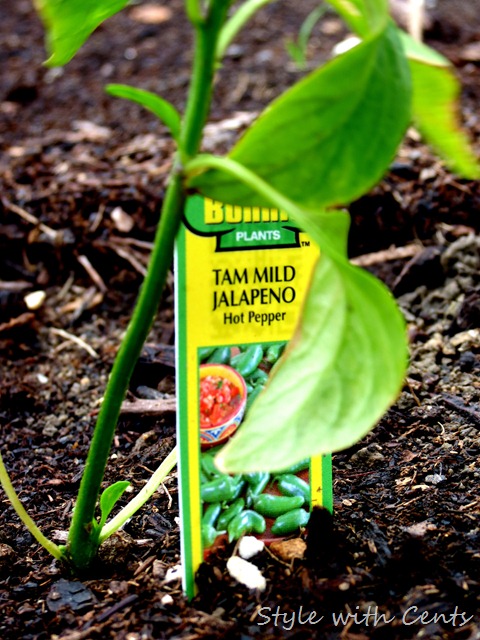
… jalapenos  (this is TEXAS, y’all … there is lots of salsa in this garden’s future) ...

square foot gardening how to garden in a raised garden bed 1

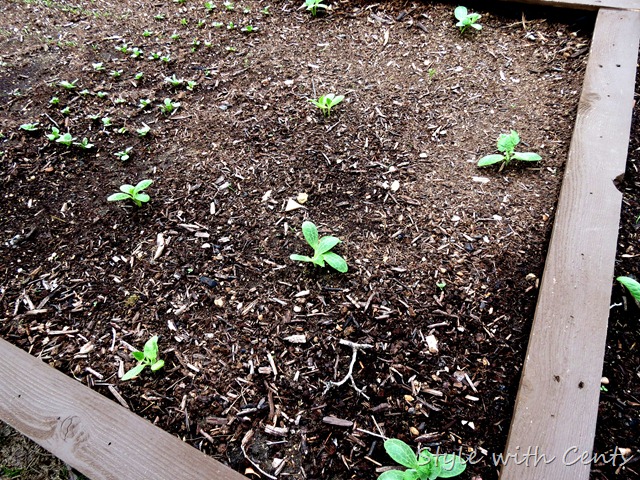
… and then, my friends … there are the milk man’s babies. I cannot figure out what these ones are. Superman planted this thing … and he’s on shift. I’m sure he’ll text me soon and let me know. Cause, that’s how we roll.

square foot gardening how to garden in a raised garden bed6

Anyway. That’s it … there’s our sweet little garden. I’ll keep you posted … cause … nothing is more fun than watching someone else’s garden grow. ;)

Please enjoy the ghetto not-yet-mowed-this-season grass. Just keepin’ it real, people.

Hope y’all are well!