Monday, January 16, 2012

How To: Hang Train Tracks

Y’all are really going to love this one!!!

how to hang train tracks on walls using heavy duty velco
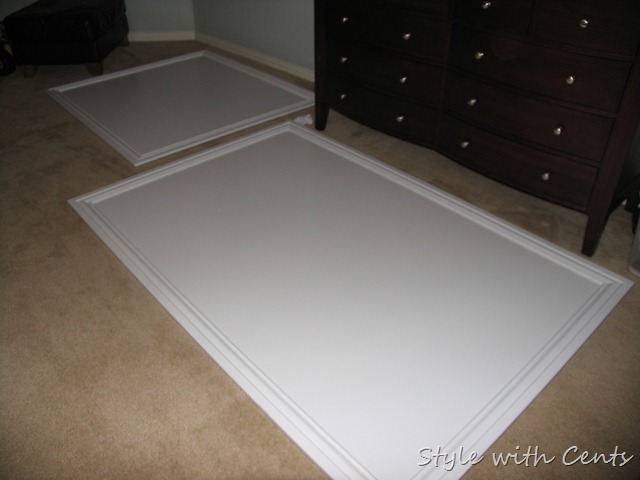
To begin this project, you need to put together your train tracks and measure to see how big your sheet of masonite board needs to be.

We measured both train sets and cut the masonite boards accordingly. Since we were hanging these on our walls, I wanted them framed … just to add a little bit more of a “finished” touch. (You totally don’t have to do this, if you want to skip a step … and not worry about miter cuts.) We used baseboard for the frames. This project uses 1 sheet of masonite and about 20 feet of baseboard. And then, of course a couple cans of white enamel spray paint (unless you really feel like brushing all that paint on with a brush). Total cost is: just under $30. (Give or take, depending on the glues, adhesives, and paints you have on hand already)

We used a combination of both hot glue and Gorilla glue to attach the frames/baseboard to the boards, then caulked around the inside of the frame to give it the finishing touch.

how to hang train tracks on walls using heavy duty velco2
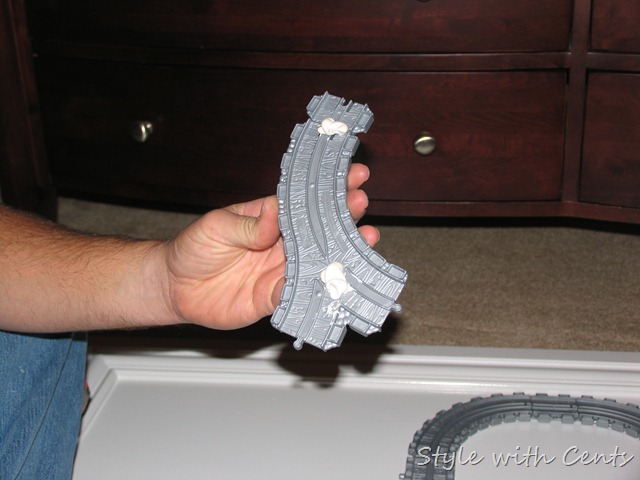
Once you finish your boards and the paint is dry, lay them flat and once again, put your train tracks together on top of them. Then remove the track, one piece at a time …

how to hang train tracks on walls using heavy duty velco3
… and DO NOT, I repeat DO NOT use liquid nails to adhere them to the board. If you try this method, you will find that the glue is no where near as flexible as it needs to be … you will have kiddos crawling across these boards and those tracks will pop right off. Trust me. I speak from experience.

Instead, grab some industrial strength velcro. It’s stronger than liquid nails. Not even joking.

So, remove one piece of track at a time and place a strip of double sided sticky backed velcro on the underside and place the piece of track back in its place. It’s a tedious task … just keep reminding yourself that it is the last time you’ll ever have to put those tricky train sets together!! :D

how to hang train tracks on walls using heavy duty velco4

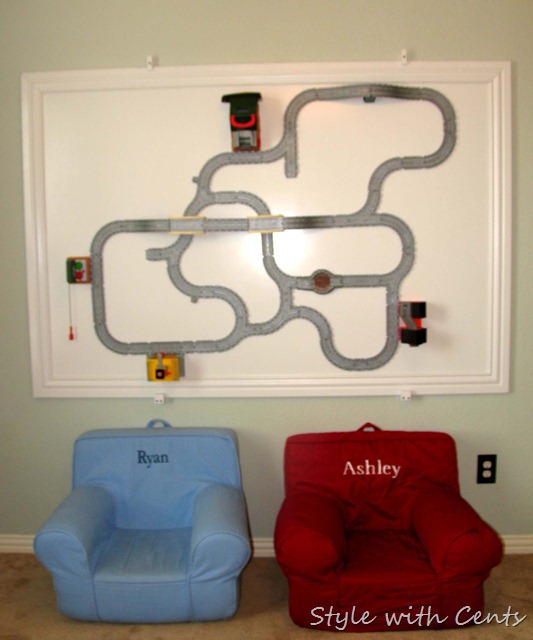
Once you get the tracks good and stuck on with the velcro (our new favorite adhesive), you can begin brain storming the myriad of options you have for hanging them on your wall. Or, you can learn from all our trial and error and go with the option we chose:

creating an inexpensive  playroom15
Superman used some solid wood scraps to build little bottom braces to set the trains on. These are mounted to the wall with 3” screws, drilled into studs. (We’ll paint the front of those screws someday … right now … they don’t bother me too much.)

creating an inexpensive  playroom16
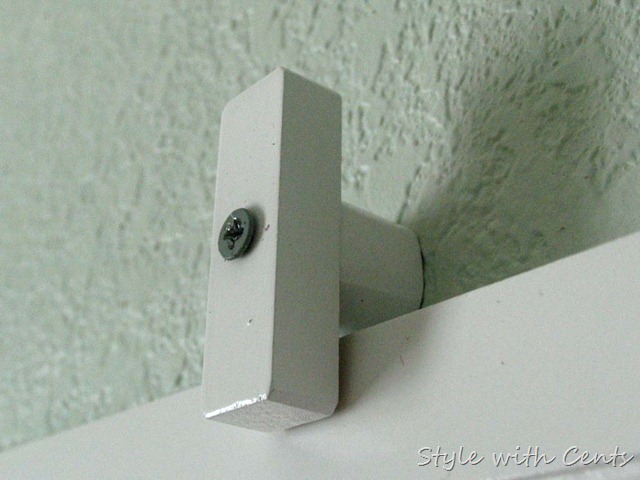
Then, he used some more solid wood scraps to build some top braces that swivel up and down to lock and unlock the boards in place. Seriously. This was pure genius. It makes it super easy to put them away and take them back down again. I’m in love with his problem solving. And, it’s super easy and inexpensive to make these braces.

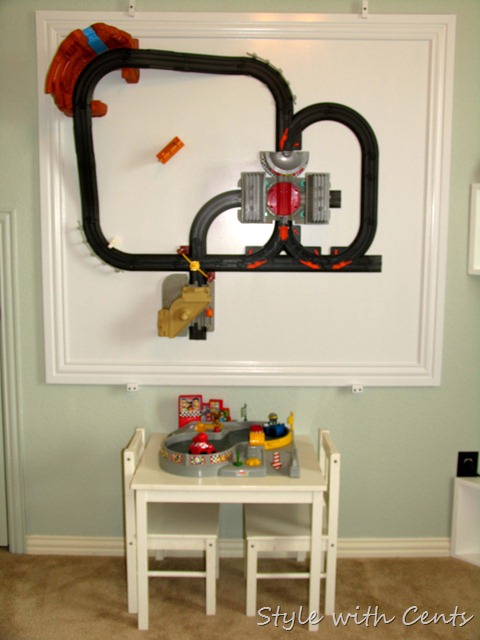
The end result is pure genius and adorable and functional all at the same time.

creating an inexpensive playroom4 hanging train tracks on walls playroom4
The storage space in the toy closet was dramatically cut back … because now I just have two small plastic shoe box size bins with all the trains and controls and props in them.

creating an inexpensive
And now, when my kids say, “Mom, can we play trains?” … I don’t cringe at the thought of having to spend a solid 20 minutes trying to figure out exactly how those trains go together.

creating an inexpensive  playroom17
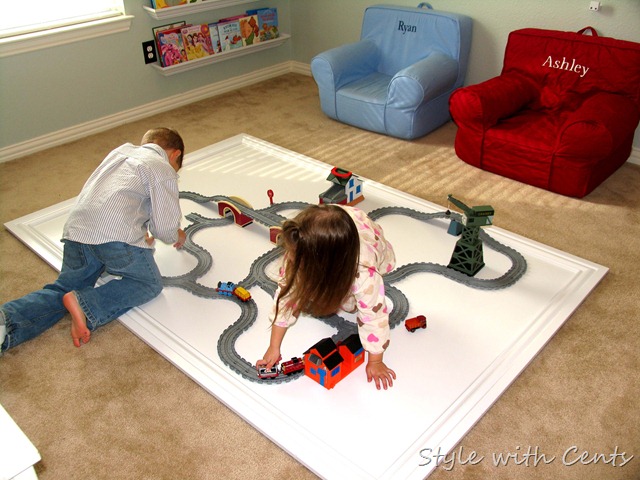
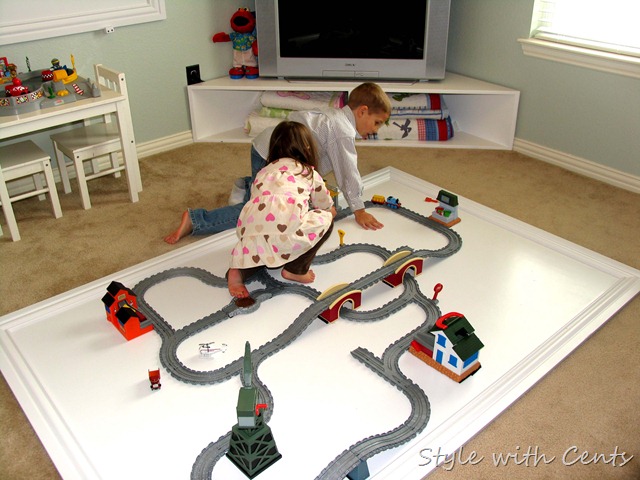
And, because the trains are stuck to the board, there is no more crying over one of them messing up or breaking the train track.

creating an inexpensive  playroom18
Which means that there is that much less fussing and whining and crying in our house on a daily basis.

So, do it! It’s cheaper than buying a train table, takes up hardly any room in storage, saves on time, and makes for a happier playing environment.

You’re welcome! ;)

Creating an Inexpensive Playroom

(**Here is the tutorial for Hanging Train Tracks on the Wall. )

As I’ve said before in previous posts, my Grandma lived with us for nearly three years. She recently moved elsewhere, which meant that we had an extra room upstairs. This is the room we lived in while she was with us. (Hence the paint color – something that we don’t feel like changing right now.)

We had two choices: create a guest room (with the furniture we already had), or sell said furniture (and giant king size bed) and create a playroom for the little guys upstairs.

We went with the second option. Who really NEEDS a guest room that gets used once or twice a year? Not us.
Our only problem?

We had ZERO playroom furniture. No entertainment center. No bookcase. No wall hangings. Nothing.
So, we budgeted a very small amount of money towards creating a playroom out of nothing.

And, here is what we came up with:
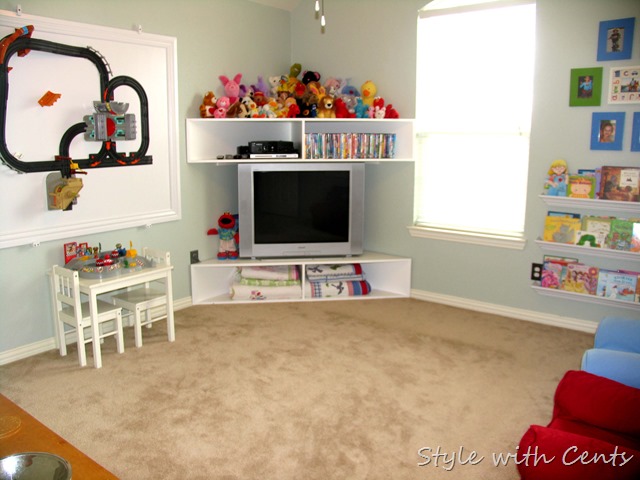
Creating an Inexpensive Playroom from Style with Cents www.stylewithcents.blogspot.com 10
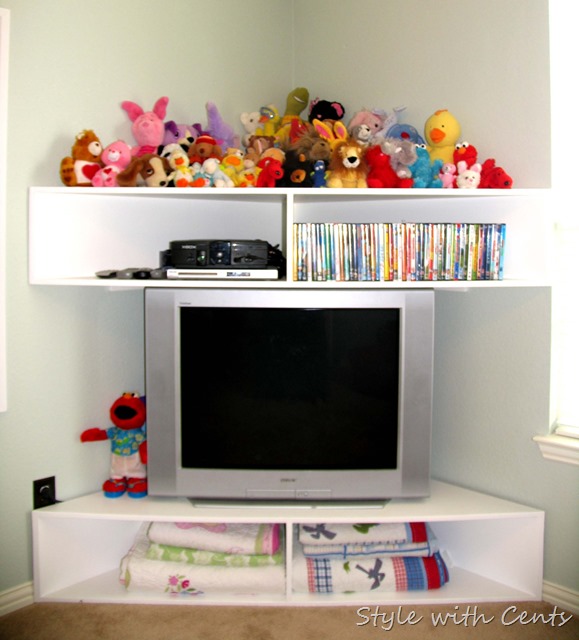
I’m in LOVE with this cute little room. We had several problems to solve along the way. First problem: Where to put the giant TV (this is an old school TV … that weighs 250 lbs. Not exaggerating or making a joke – it really weighs that much!). We decided it would take up the least amount of room if it was in the corner of the room.

So, I brain stormed and told Superman my idea for a corner-double-shelf-slash-built-in-thingy. I drew out a simple sketch of what I was talking about and he said, “You go get the materials and I’ll build it.” Superman HATES going to Home Depot. Isn’t that hysterical?! I think so.

Anyway, I went to Home Depot and figured out that I could buy one sheet of MDF (they come 4’x8’) and cut that in half … and then cut both halves into half again, but diagonally, and that would give me the 4 perfect sized pieces that I needed for the top and bottom of each shelf. Then, I grabbed 3 pre-cut shelves (the kind they install in your laundry room and pantry – also made of MDF), and that would be enough for the sides and center support. Total price? $13 for the sheet of MDF and $27 for the shelves, so $40 for the pseudo entertainment center … plus a couple cans of white enamel spray paint (Rustoleum, of course ;). Superman knocked that out in one afternoon. (He drilled big 2” holes in the back of the top shelf so that the cords to the DVD and Xbox could hang down behind the TV, instead of hanging all over in front.)
The best part about this corner shelf idea: ALL THE ROOM TO STORE STUFFED ANIMALS! Seriously. By far, my most favorite part. My kids LOVE stuffed animals. It’s always baffled me. I have zero use, need, or value for stuffed animals, so it takes everything in me to not chuck all of them in the Salvation Army bucket.
Creating an Inexpensive Playroom from Style with Cents www.stylewithcents.blogspot.com 11
(There was a trick to setting them all up, and I’m short, so this isn’t the best view, but I put a couple old boxes in the back, covered those up with a blanket, and then topped them with the animals. It made the ones in the back sit high enough to be seen. Silly idea, but it made a big difference in the display.)

And now for another one of the problems we came across: This is a VERY small room … and my kids have a TON of toys. I blame Santa and popularity (large birthday parties). LOL!! Y’all know I’m joking, right? Anyway.

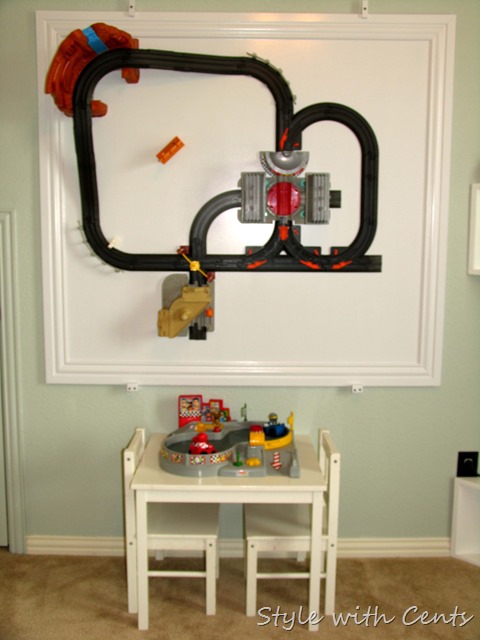
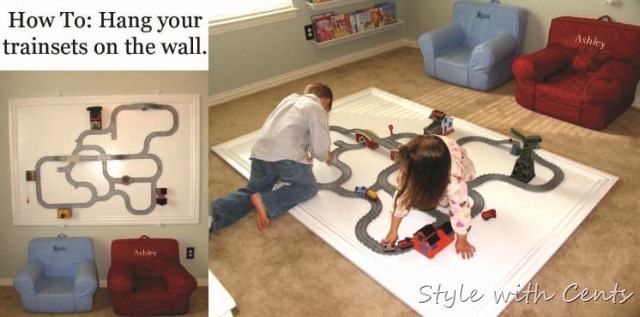
So, I told Gary that it would be awesome if we adhered their train sets to boards so that we didn’t need to take up a ton of room (which we didn’t have) with a train table. (I’ll do a separate post with a tutorial on how to do this. Because, believe me, there was PLENTY of trial and error that went into this.)
Creating an Inexpensive Playroom from Style with Cents www.stylewithcents.blogspot.com 12
So, that solved the no-room-for-a-train-table dilemma. And, it also solved a few other dilemmas: 1. We never have to set up these train sets again!!!! These aren’t easy to set up train sets, or like the IKEA trains that you put together in a number of ways. These train sets have specific directions on how they go together. It’s a nightmare for small kiddos. 2. We didn’t have to come up with any “playroom friendly” wall décor on either of those walls. This was a huge bonus because it totally saved us money (and, I can never find kid type art/wall décor that I like enough to buy and hang).

Creating an Inexpensive Playroom from Style with Cents www.stylewithcents.blogspot.com 14
(I would like to throw a super random plug in here to the parents who picked traditional names for their children … go to eBay and type “Pottery Barn Kids your child’s name” into the search engine. You will be amazed at all the cute and inexpensive things you can find. I found these chair covers for $4.99/each WITH THE MONOGRAM! It’s been years since I bought them, but at the time, there was a knock off manufacturer who made the insert for the chairs and sold them for $20 (they might still be selling on eBay – you never know!). So, I paid $25/each for these chairs, when PBK sells them for close to $100, including monogram. So … check out eBay. I go on from time to time just to see what cute monogrammed things are for sale.)

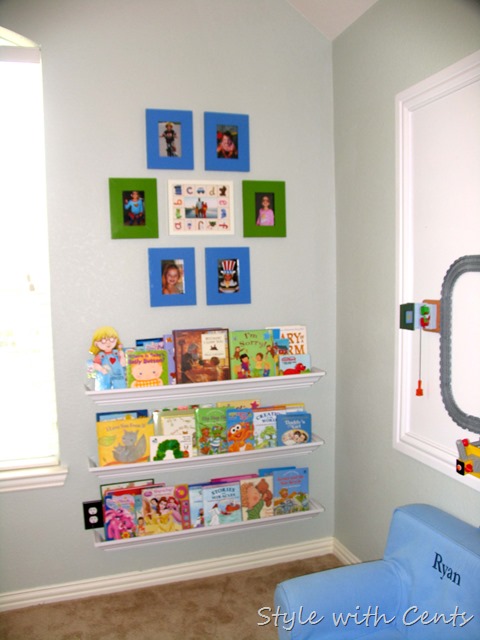
Problem number three … a smaller part of our original problem … no bookcase. My 3 year old is an avid reader. Stop laughing. I’m dead serious. We were blessed with a child prodigy who is smart beyond her years and has a voracious appetite for reading and books. (No, she doesn’t ACTUALLY read … but she can recite books, word for word, after we’ve read them to her.)
Creating an Inexpensive Playroom from Style with Cents www.stylewithcents.blogspot.com 13
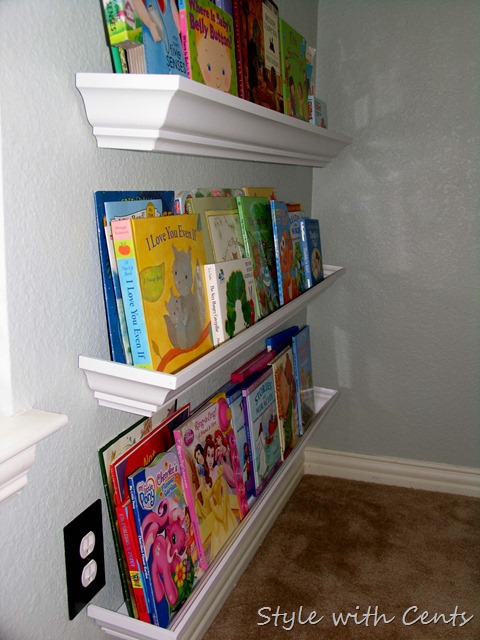
So, we needed somewhere for all of the upstairs books. (I teach preschool and have a classroom downstairs full of books … but we’ve always had a ton of “special” books upstairs that she reads in her room, etc.) I went to IKEA and found similar shelves … but they were $14.99/each. So, once again, I told/showed Superman what I wanted for bookshelves. He sent me to Home Depot … and when I got home, I sent him to the garage. The finished product is perfect!
Creating an Inexpensive Playroom from Style with Cents www.stylewithcents.blogspot.com 5
They are deep enough to hold several books on each. These three little shelves house 78 books! SCORE! (We used crown molding and strips of MDF for the shelf. Total cost for all three shelves: $12. Take that, IKEA.)

Creating an Inexpensive Playroom from Style with Cents www.stylewithcents.blogspot.com 1
I don’t know why the paint color in this room is photographing so unevenly. In case you want the name of this color, it is Sherwin Williams Sea Salt. Pretty much the most beautiful color ever. Not lying.
Creating an Inexpensive Playroom from Style with Cents www.stylewithcents.blogspot.com 2
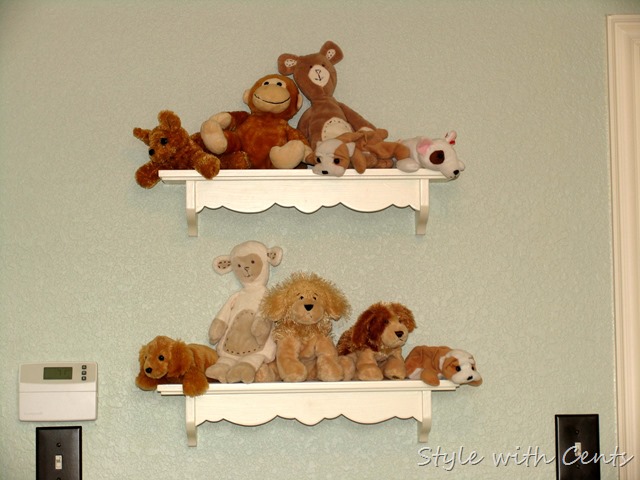
These two little shelves used to be in our upstairs bathroom before we did the makeover in there. When we took them down, I knew exactly where I wanted to use them next. Since I have such an extreme love for stuffed animals (dripping with sarcasm), I thought they would make for cute decoration if displayed on these little shelves. Note: I hung them high enough that my kids can’t reach them. Because they seriously really are just for decoration. I’m mean like that.

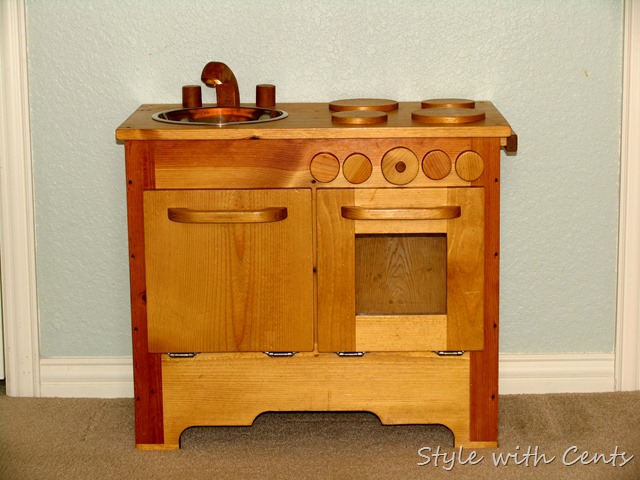
For those wondering … yes, Superman did make this play kitchen. He made it during Thanksgiving Break a couple years ago while we were at his parent’s house. His Dad is Superman, Sr. and the two of them spent quite some time in his Dad’s shop putting this together WITHOUT A PATTERN/PLAN. They just made their own dimensions and went with it. They. Are. Amazing. (The sink is a stainless steel bowl and the oven window is complete with a sheet of plexiglass. Adorable.)
Creating an Inexpensive Playroom from Style with Cents www.stylewithcents.blogspot.com 3
So, back to the second problem of having very little room in the room … I solved that by dedicating every inch of the walk-in closet to shelving for toys … and by removing all ‘toys’ from the room and organizing them onto the shelves in the closet.

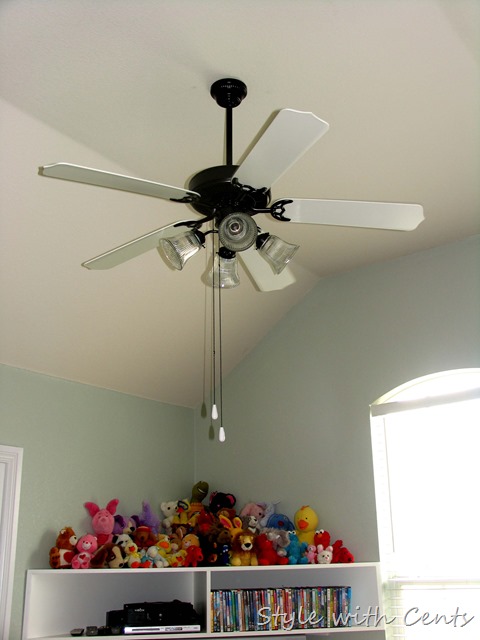
Oh. And the ceiling fan in their playroom used to be … drum roll please … BRASS. Superman took that down, removed the fan blades, and sprayed all the brass with oil rubbed bronze spray paint instead. It looks SO much better.
Creating an Inexpensive Playroom from Style with Cents www.stylewithcents.blogspot.com 4
When he got done, he said: “I actually kind of like that fan now.” My sentiments exactly. We’re giving all those builder grade fixtures ‘the finger’ and it feels great! :D

So … go ahead … lay out your plan of attack for your playroom.

Creating an Inexpensive Playroom from Style with Cents www.stylewithcents.blogspot.com 8
I promise … it will be worth it and your kiddos will LOVE you for it!

Creating an Inexpensive Playroom from Style with Cents www.stylewithcents.blogspot.com 9
I cannot even begin to tell you how much I don’t miss hearing, “MOM!!! Ashley broke the train track AGAIN!!!!!” It’s like sweet {non} music to my ears.

Here is the tutorial for Hanging Train Tracks on the Wall.
Friday, January 13, 2012

Re-Using an old, discarded chandelier

We are the original owners of our house. When we moved in, there was a dated BRASS chandelier in the “formal” dining room.

A carpeted formal dining room.

Seriously? Who eats on carpet?

Well, we quickly replaced the chandelier with a ceiling fan … because we live in Dallas … and we were never using the carpeted room for a formal dining room anyway.

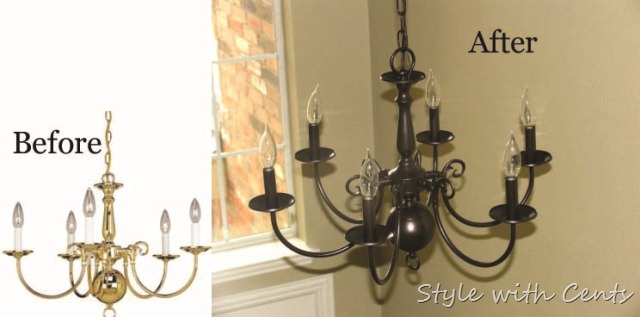
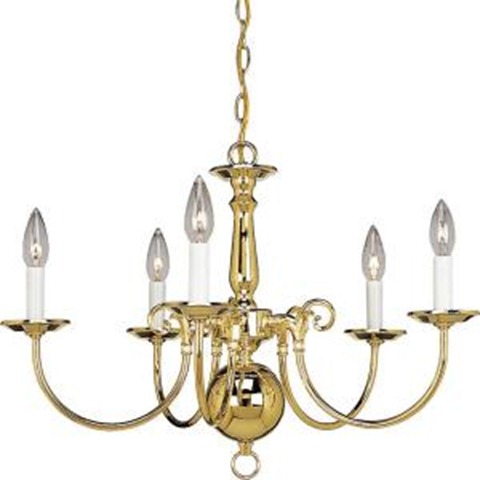
To my complete shock (and almost horror), Superman found the chandelier in our attic recently. I don’t know why we hung on to it because there is NO way I would hang it in our house. You’ve seen it before. You might even HAVE this exact chandelier in your home. If you do and you love it, my apologies.

Here is the most recent victim of our Rust-Oleum Oil Rubbed Bronze spray paint goodness:

rustoleum oil rubbed bronze spray paint chandelier before after

I forgot to take a ‘before’ picture … you know … before we declared war on all that brass.


chandelier before

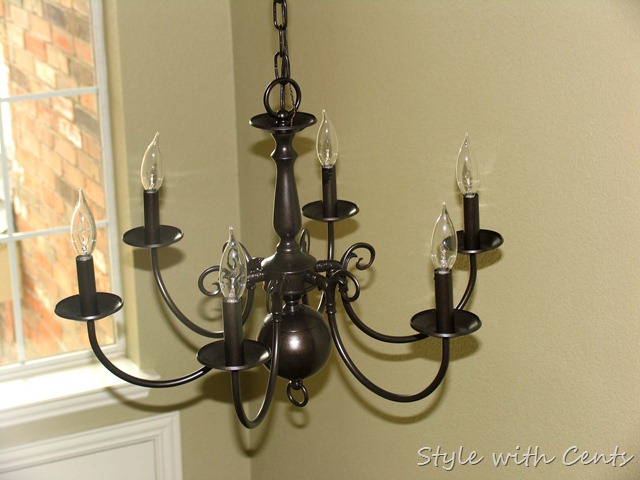
After we sprayed it with oil rubbed bronze, I was so excited that I had hung on to that ugly brass chandelier because I knew exactly where it needed to go …

rustoleum oil rubbed bronze spray paint builder grade chandelier

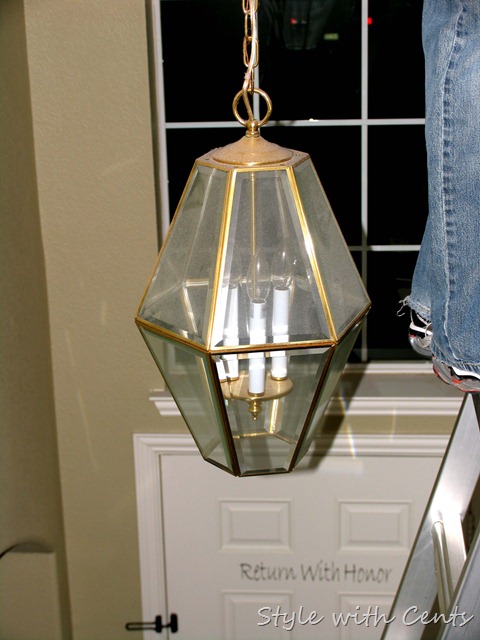
… in our entry way. To replace … yet again … more brass. I almost didn’t get a ‘before’ picture of that dusty hanging light. I had to snap a quick pic while Superman was on the ladder taking it down.

We used the same long chain from the original hanging light and just spray painted that too … we needed it … the other chain just wasn’t long enough.

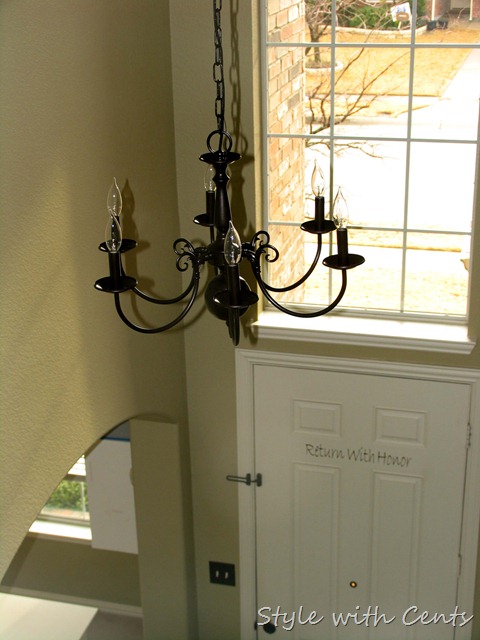
It took Superman a couple hours to take the old one down, remove the chain/wiring, spray paint it, and then re-wire the chain and wires to the newly spray painted chandelier. Then, he hung it up … and holy moly …

rustoleum oil rubbed bronze spray paint builder grade chandelier 2

… it looks so much better than the dated brass hunk of glass and junk that used to hang in its place.

rustoleum oil rubbed bronze spray paint builder grade chandelier 3

Seriously. For the whole $2 worth of paint that it took to change out the two fixtures, it was WELL worth it. Because at this point in time, the game is: trying to change everything out while spending the least amount of money possible.

Mission. Accomplished.

rustoleum oil rubbed bronze spray paint chandelier before after

Sunday, January 8, 2012

$1 Front Porch Light Makeover

Our latest project:

Updating the sad porch light out front. The thing was beat to smithereens during a record breaking hail storm last April.

Well. That … and it was just plain ugly to begin with.

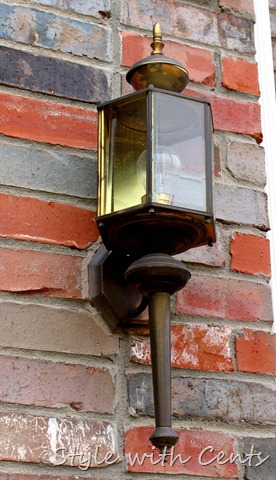
Behold, I give you more brass:

rustoleum oil rubbed bronze spray paint front porch light fixture 5

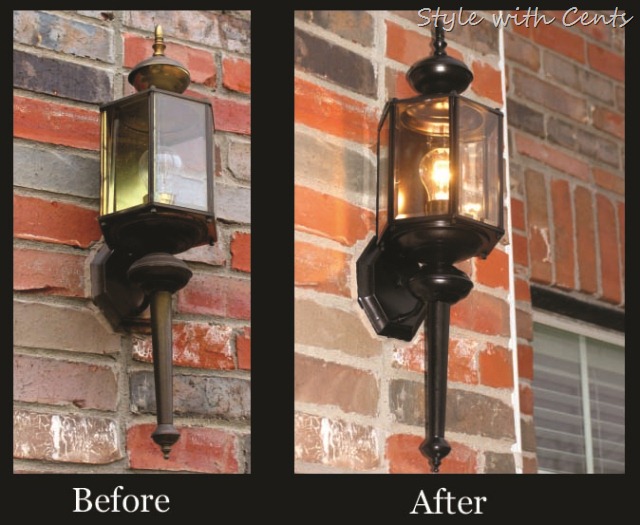
And then, a few minutes later after we kicked its butt with some Rust-Oleum Oil Rubbed Bronze spray paint:

rustoleum oil rubbed bronze spray paint front porch light fixture 2

Total cost: About a dollar. Booyah.

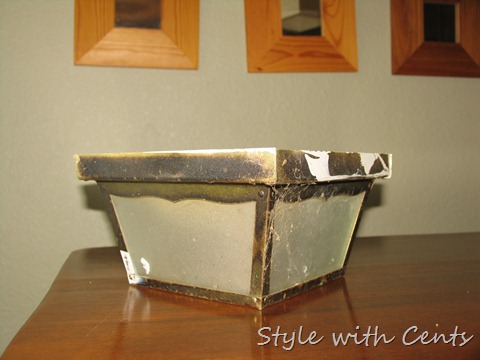
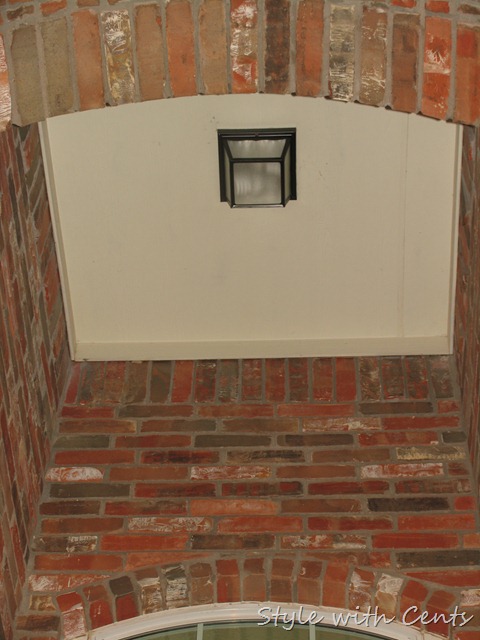
And here is the front porch ceiling light before …

rustoleum oil rubbed bronze spray paint front porch light fixture 4

Ummmm … that would be 7 years of gross. So. Disgusting. So, we cleaned it out real good, scraped the white paint of the places where the lazy painters made their mess … hit it with a little spray paint and …

rustoleum oil rubbed bronze spray paint front porch light fixture

SHAZAAM!!! Now, I realize this light is way up high and probably no one but me ever looks at it … but I sleep all warm and fuzzy at night knowing it was taken care of. ;)

rustoleum oil rubbed bronze spray paint front porch light fixture 6

And that, my friends, is how you save yourself a quick hundred bucks on front porch lighting. Man. I LOOOOOOOOOOOOVE Rustoleum.

rustoleum oil rubbed bronze spray paint front light before after

Saving the world. One ugly porch light at a time.

Friday, January 6, 2012

How to: Hang a swing or trapeze in your home

As I have said before, we live in Texas. Last year, we broke the all time record for most days over 100 degrees. It was something like 77 days or another ridiculous number close to that.

When it is that hot outside … you do not send your tiny children out. They will cook to death. So, our solution was simple:

How to Hang Swings Indoors www.stylewithcents.blogspot.com

Bring the fun of the outdoors … IN! Here’s how:

1. Locate a joist or solid beam in your home; One that has plenty of room on either side … conducive to swinging. Perhaps … a doorway or hallway. ??

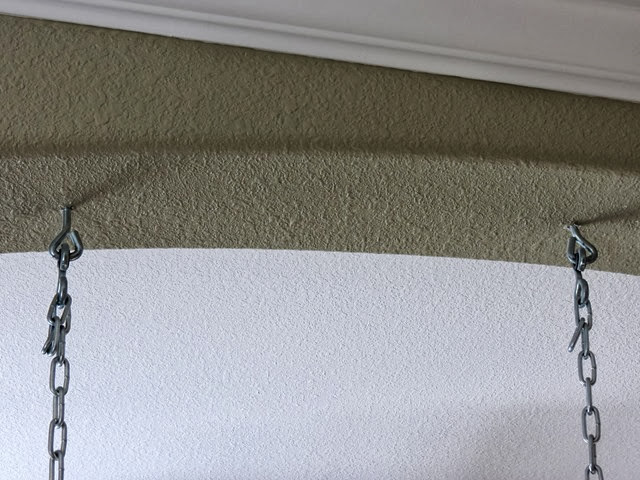
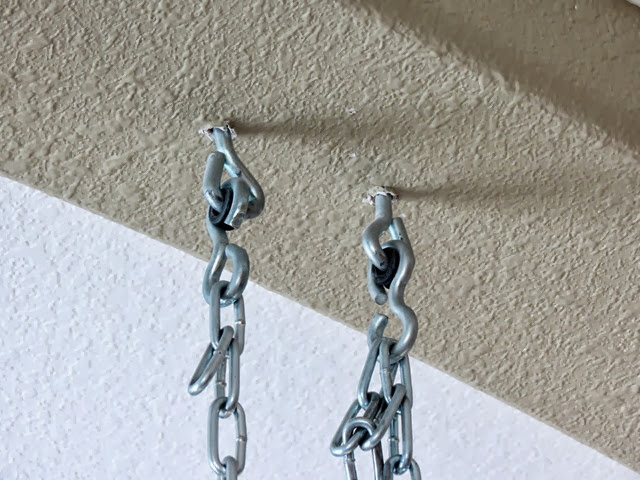
2. Pick up some porch swing hangers (the hardware shown below). I’ve been able to find them at Wal-Mart all three times I’ve needed them. They cost about $6 for the two pieces.

3. Screw those puppies into the joist. The ones we used are about 6 inches long and at least 1/4” in diameter – these are some big screws!

Hanging Swings Indoors Using Porch Swing Hardware www.stylewithcents.blogspot.com

4. Figure out how high or low your swing(s) needs to hang and make adjustments accordingly. Our children were very small when we first installed our swings, so additional chain, to lengthen the swing, was necessary.


Indoor Swing Hardward Porch Swing Hardware www.stylewithcents.blogspot.com


Indoor Trapeze Swing www.stylewithcents.blogspot.com

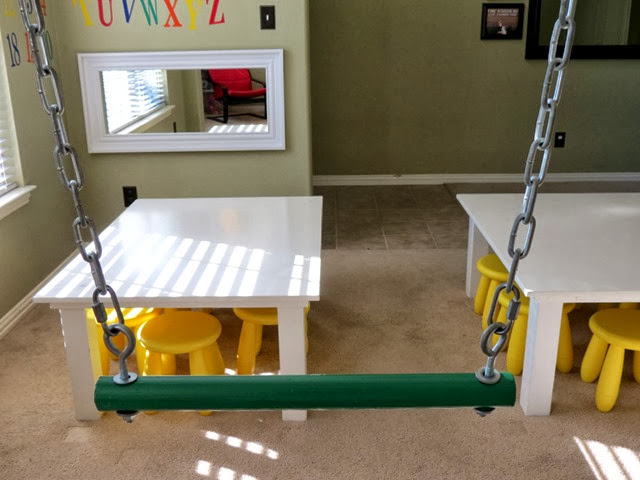
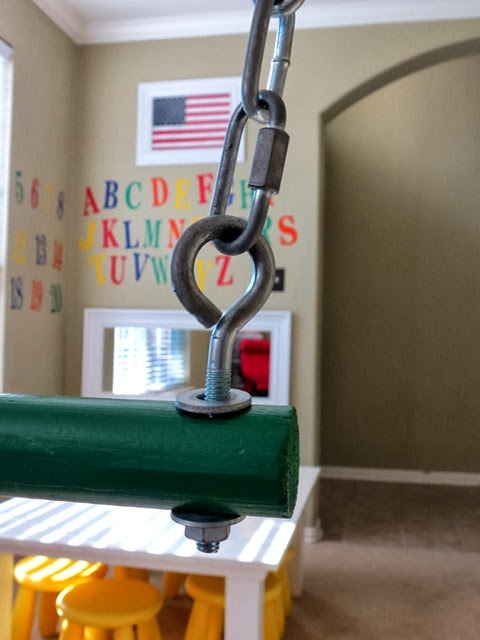
5. If you are making a trapeze (or “monkey swing” as it is called in our house), you just want to pick up a piece of wooden rod (about 14” across), drill a hole on either end (spray paint it your favorite color), thread some bolts through it, and finish it off with a washer and nut below the rod.

Swing Hardware for Hanging Swings Indoors www.stylewithcents.blogspot.com

Bingo. A trapeze swing for pennies!


Hanging Swings Indoors www.stylewithcents.blogspot.com

6. You can find swings, like the green/yellow one pictured, at Wal-Mart, Home Depot, Toys R Us, and many other stores for around $12-$30/each. They are worth every penny!

Once you’ve installed your indoor swing set … sit back and watch, with calm assurance, as your 3 year old pushes your 1 year old on the swing. This seriously saved my life when they were little. I never worried about them getting hurt because the swing was a foot off of the carpeted ground.

These are great in the winter time too … when it’s just too cold to go outside! 

This was one purchase/install that we have never regretted. Hours and hours of enjoyment, watching our children swing and squeal in delight.


** BTW, since this was installed in a joist … my husband and I often swing with the kiddos on our lap. It can take the weight! It’s held over 300 lbs of adults and kids before and never budged.

For those of you with questions:

1. No, we have not noticed any wear pattern on our carpet under the swings. Not even a little bit.

2. When we don’t want the swings down … we just tie them up on a hook, which is mounted on the side of the wall. When we want them down again, we just unhook them and they drop right back into place.
$2 Ceiling Fan Make-over (with tutorial)

Here we go again … more brass. It’s every where. EVERY. WHERE.

We live in the Dallas, Texas area … which means that there is a ceiling fan in every room … to keep us from melting in the scorching summer heat. :D

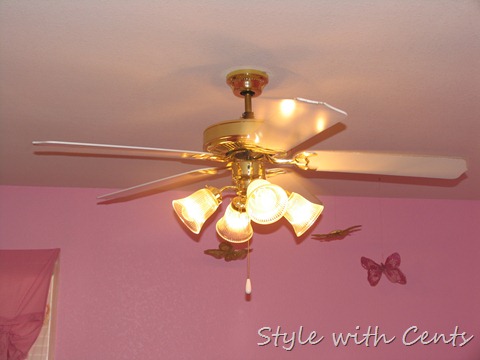
Here is my daughter’s bedroom ceiling fan. Builder’s grade. Ugly. Brass.

rustoleum oil rubbed bronze spray paint builder grade ceiling fan

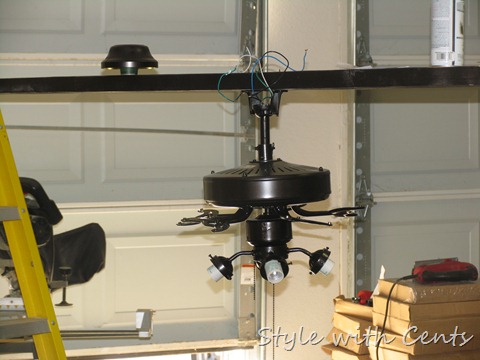
So, I had Superman take the fan down … I cleaned it up really good with soapy water … and I sent the poor guy back out to the garage to spray paint it with some Rust-Oleum Oil Rubbed Bronze spray paint. Since he’s a firefighter, he was worried about the white plastic that surrounds the casing that the light bulbs are screwed into. See what I am talking about in the picture below? Those white tube things? He did NOT want those sprayed with spray paint, aka flammable material. (The last thing we need is the firefighter setting his own house on fire!) So, he taped those off really good so they would not get paint on them. I must recommend that you do this. There, I recommended it.

rustoleum oil rubbed bronze spray paint builder grade ceiling fan 4

To make the job easy, he suspended a 2x4 from a couple of buckets in the garage, screwed the fan mount to the board, and then just hung the fan from the 2x4. It made it super easy to paint.

rustoleum oil rubbed bronze spray paint builder grade ceiling fan 2

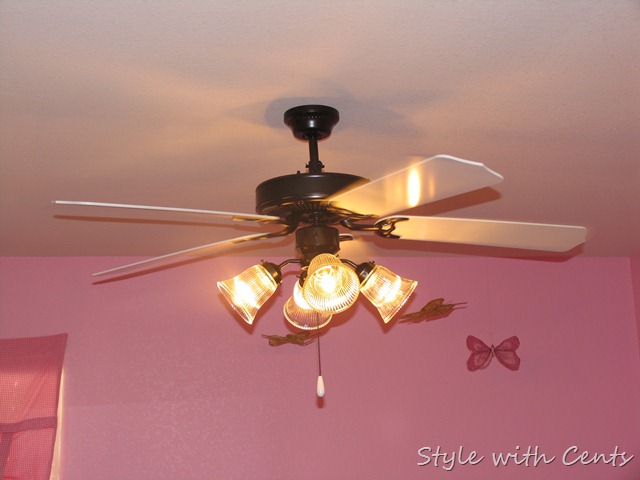
The whole process, start to finish, was only a couple hours and literally cost pennies. Maybe a third of a can of spray paint? Maybe? And believe me, you’d spend more time if you bought a new fan … put it together … and then hung it up. This was easy peasy.

Here’s the before and after:

Ashley's room before after 2

Sorry. Those aren’t the best pictures. The fan was on … and I was too lazy to pull the cord to turn it off. ;)

$15 alternative to painting a dresser

Six years ago, my husband and I took a trip to Haverty’s to buy some furniture for our unborn son. We are sort of furniture snobs … when it comes to dressers and beds, we only buy solid wood. Period. End of discussion.

IMG_3180

At the time, we were rookie furniture buyers. And the set of bunk beds and matching dresser that met our durability criteria only came in this natural color. Not my favorite. At all. BUT, I’d rather have a natural colored dresser that withstands the test of time, than a different color of junky furniture that we’d have to replace in a couple years. I digress.
So, we made the purchase.

It has since been moved into our daughters room. We did not paint our son’s room bright pink. We aren’t that harsh.

Anyway, I never liked the wooden knobs on the dresser.

IMG_2903

Never. Seriously … wooden knobs?!

But, I always had the intention of replacing them with some beautiful metal knobs … and then got busy making babies, building my own preschool, being a mom and wife, yadda yadda … and those metal knobs went by the wayside.

Now that we’re on this kick to actually follow through with all of our intended projects, for the lowest bottom dollar, I did what I always do these days: I sent Superman to the garage to spray paint those knobs. (yes, Rust-Oleum Oil Rubbed Bronze spray paint)

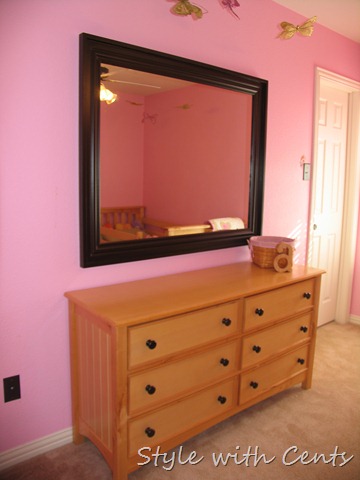
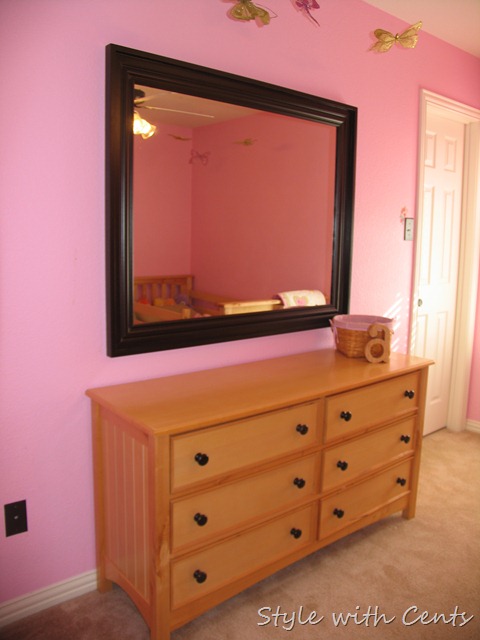
And, see the mirror that is sitting on the floor behind the dresser? Yeah. A friend gave us that mirror 3 years ago when she re-did and room in her home and no longer needed it. We intended to frame it. 3 years ago. Sigh. So … I sent him to the garage with the mirror while I ran to Home Depot to buy $10 worth of baseboard. :D

A few hours later:

IMG_3180

We had a beautiful framed mirror … and a revamped dresser … with minimal effort. The project took only a couple hours of time … and less than $15 (baseboard and paint), since we already had the mirror. However, you can frame a purchased sheet of mirror, which  you can buy at Home Depot for cheap!!!

And now, the before and after:

Ashley's room before after 1

Completely changes the look of the whole thing … hardly any work, hardly any money. That mirror looks way more expensive than $10, don’t you think?

I’m telling you … don’t bother sanding, scraping, priming, and painting. Paint up the knobs to match a nice framed mirror. Booyah.

$20 Bathroom Refurb

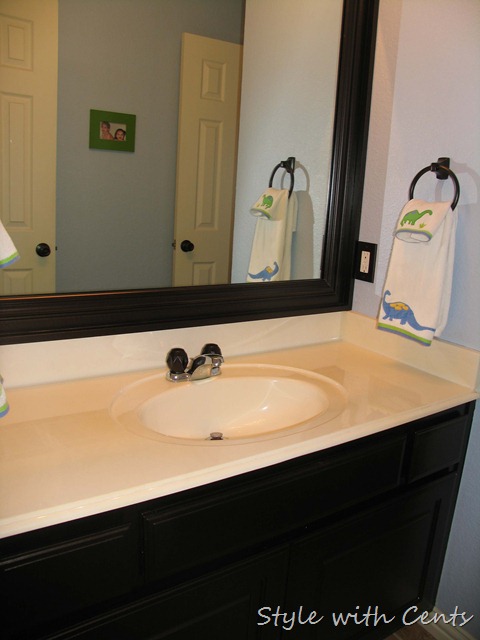
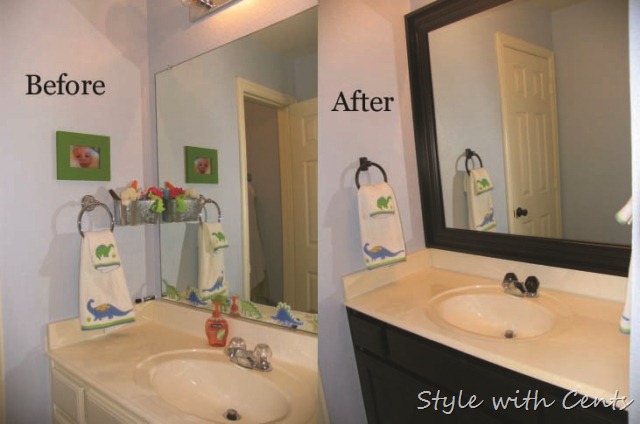
We just completed the refurb on our upstairs bathroom. We used baseboard and Rust-Oleum Oil Rubbed Bronze spray paint. And that's pretty much it.

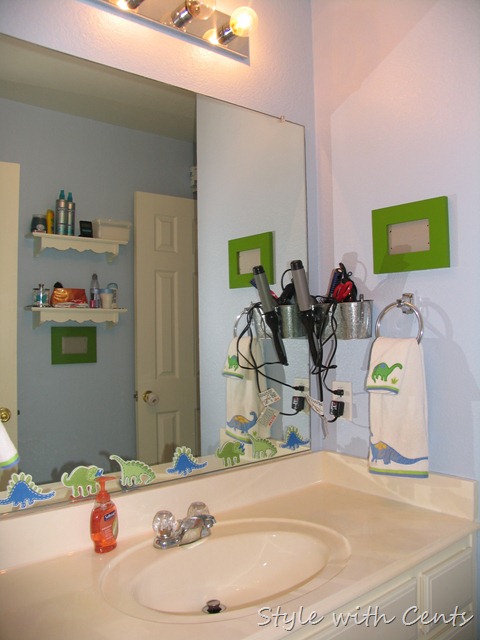
The ‘before’ pictures on this are a little crazy with clutter because for nearly 3 years, we shared this small bathroom with both of our children. (My Grandma moved in with us, we gave her our master bedroom/bathroom downstairs, and we moved upstairs with the kids. Sacrifice of serious proportions and love.)

So.

I'll give you the nice 'after' picture to get you through the ugly 'befores' that are coming. :D

upstairs bath3

Anyway. Here is what the bathroom once was. Holy clutter. We were just trying to survive.

IMG_5711

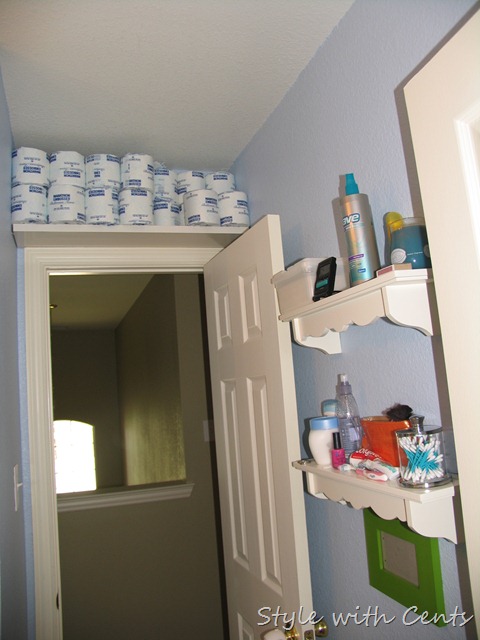
My eyes are burning with all the clutter. There was NO WHERE to store our bathroom supplies, so I turned to hanging buckets on the wall … yes, those are the same buckets that now hang in my master bathroom. Good eye!

IMG_5712

Yikes. Clearly, not going for aesthetics at this point.

IMG_5713

100% functionality. The picture frames were empty at the time that these pictures were taken (nearly 3 years ago). I did, however, put pictures in them later. I swear. ;)

IMG_5715

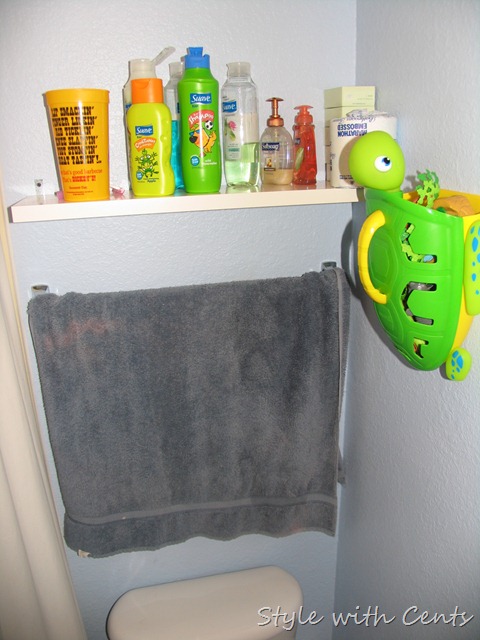
I’m in bath toy hell right about now. Please. Someone come save me!

That was our life. For 3 years. 2 adults, 2 children. Makes me itch just thinking about the confinement. ;)

And, here we are now:

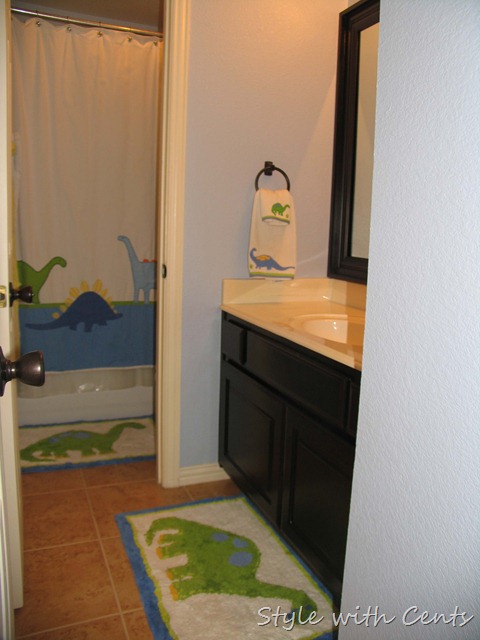
upstairs bath5

We used the same Rustoleum Oil Rubbed Bronze spray paint for this project. I’m a little obsessed. But, don’t knock me until you try out the color. It’s gorgeous and magnificent. Too bad it photographs black … because it is not black.

upstairs bath1

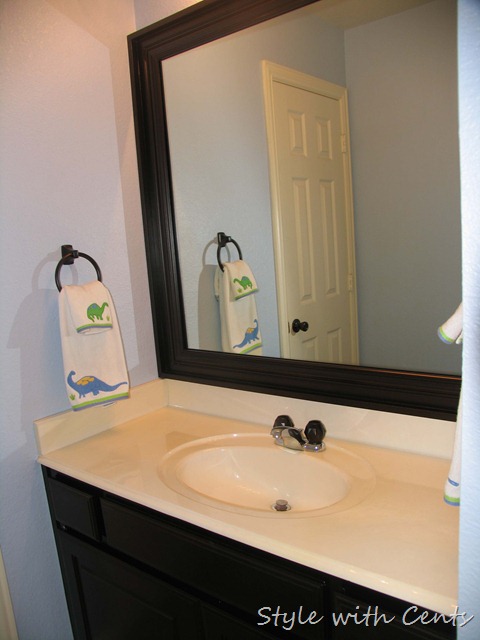
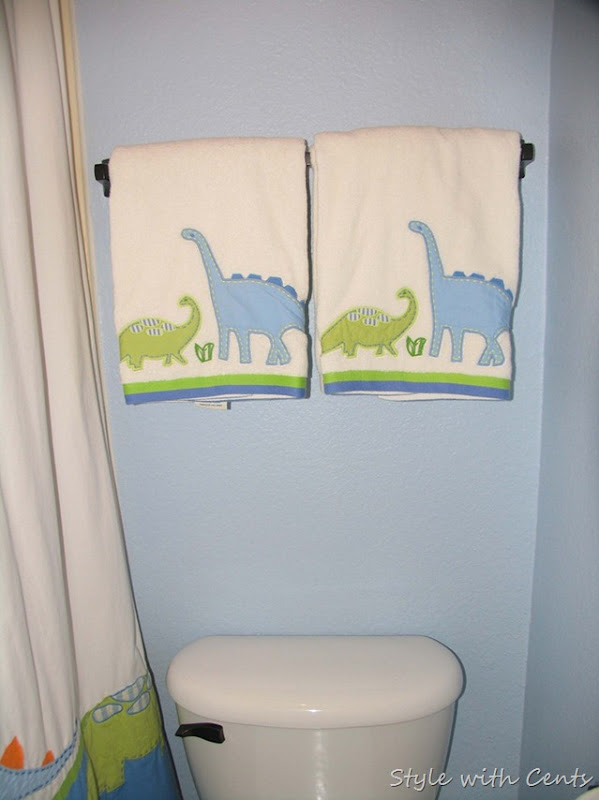
You’ll notice that all of the fixtures and door knobs were sprayed with bronze.

upstairs bath3

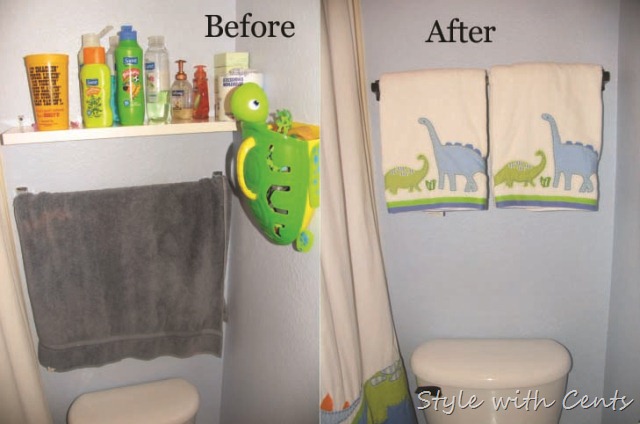
We also took down all the craziness from the past 3 years and de-cluttered the small bathroom. No more make shift shelves or stainless steal buckets full of cords. Ahhhh.

upstairs bath4

No more bath toy hell either. Can I get a hallelujah?! ;)

upstairs bath2

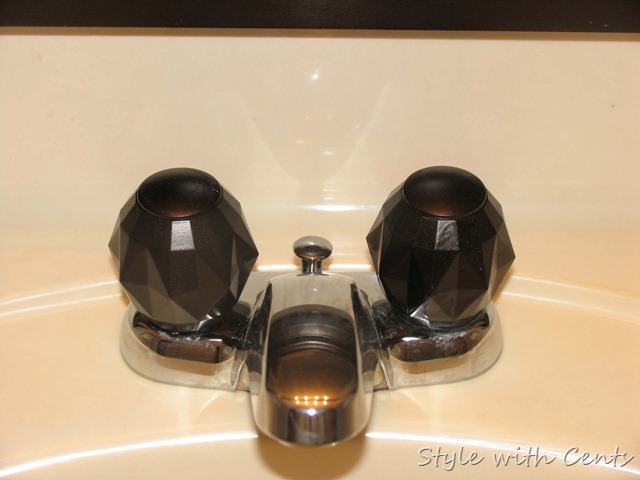
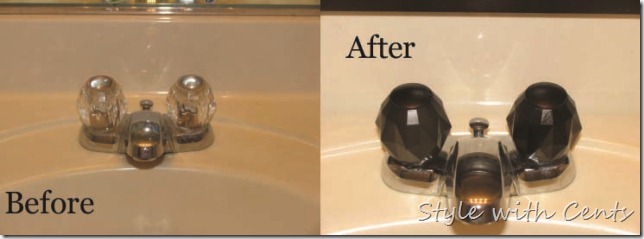
I have always hated the faucet in the bathroom upstairs. Very dated. And the red and blue hot and cold handles … seriously … like we need them labeled? If you haven’t figured out which one is hot and which one is cold by the time you are old enough to recognize color coding, you don’t deserve to wash your hands! ;) So … I did what I do with every other builder grade aspect I don’t like: I had Superman spray paint it. It looks better in real life than it does in the photograph. :D

And … here are the before and after pictures:

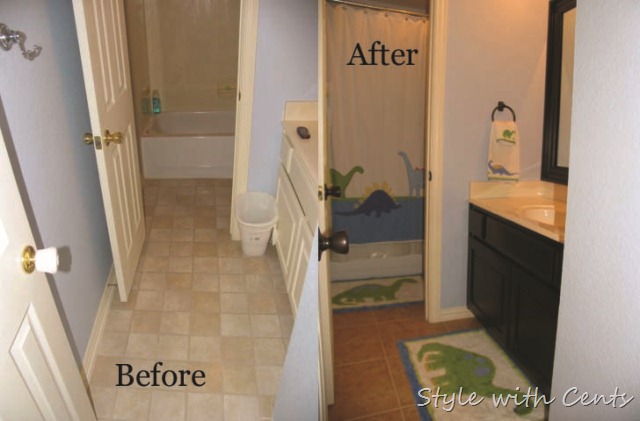
bathroom renovation using rustoleum oild rubbed bronze spray paint upstairs bath before after2

This was the flooring when we bought the house … we had it tiled a few years ago. The cost of tiling the floor is not included in this $20 makeover.

bathroom renovation using rustoleum oild rubbed bronze spray paint upstairs bath before after3

Huge difference.

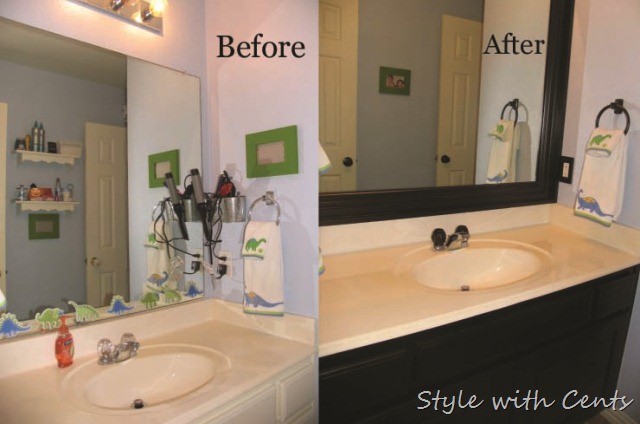
bathroom renovation using rustoleum oild rubbed bronze spray paint upstairs bath before after4

$6 of spray paint and $14 of baseboard for the mirror.

bathroom renovation using rustoleum oild rubbed bronze spray paint upstairs bath before after5

Yes, we spray painted the toilet handle up here too. ;)

bathroom renovation using rustoleum oild rubbed bronze spray paint upstairs faucet before after

Bye, bye color coded hot and cold handles!

All four of us love the new look. My kids feel so special now!! :D